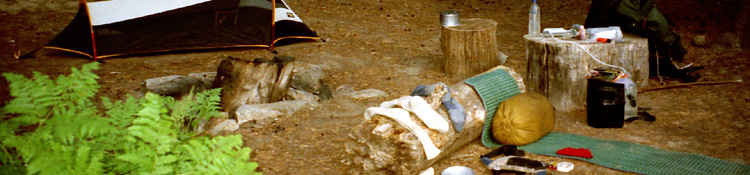
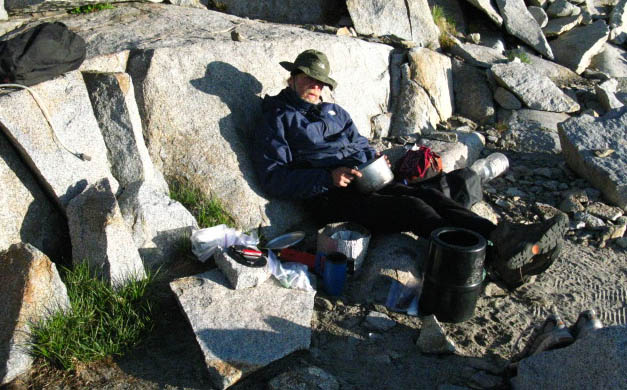
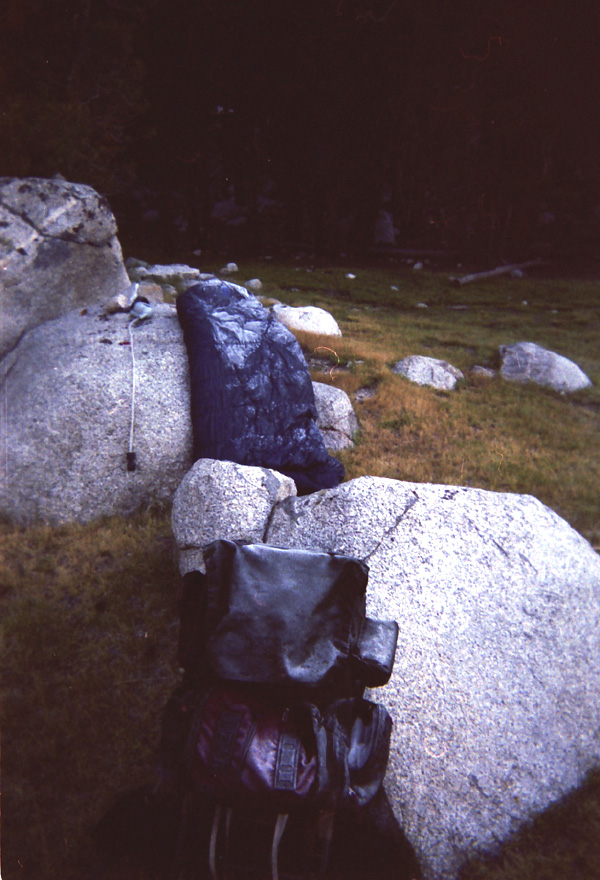
Stubblefield Canyon lower campsite properly set for comfort, convenience, rest, and recharge
High Sierra
Backpacking
Trail Guide
Forums
Sierra
Weather
WeatherNotes Northern
Sierra Weather
Gear
High Sierra
Backpacking
Camp & Trail Skills
Languages
Trail Skills
Mountain
Safety
Food
Planning
Trail Arts
More
Information
Social
| HOME PAGE |
GEAR LIST |
ART OF WALKING | PHYSICAL PREP |
FIVE DAYS FOOD | SCRAMBLING | WEATHER | ASTRO LINKS |
NAVIGATION |
Basic |
|||||||||||||||||||||||||||||||||||||||||||||||||||||||||||||||||||||||||||||||||
The Importance of a Good Camp SiteSetting up a safe, protective, convenient, comfortable, and nourishing campsite is vital to maintain, if not restore our energy over many hard days on the trail. For me the trail and the camp nourish each other, and they are both good. A beautiful trail is well complimented by a beautiful campsite. But all trail experiences are not fine weather and easy hiking. Things get harsh in the wilderness. Having the capacity to set up a warm and secure campsite in non-optimal circumstances anywhere is a vital skill. The physical drain that exposure to the wind, the Sun, and the harsh conditions that come with the beauty we will encounter while hiking up and down steep mountains at high elevations carrying a heavy pack must not be underestimated. The physical strains of the application of body to trail take a deep toll on one's energy reserves and metabolism as well as producing tremendous amounts of structural stress on your bones, tendons, ligaments, and muscles. These stresses must be prepared-for prior to engagement, and well-absorbed during. The Physical Preparation and Arts of Walking sections treat these vital issues for the long distance backpacker. Here we deal with where the trail meets the campsite, getting off the trail at the end of the day, when and where we must create the space necessary to rest and recover enough to resume again the next day. I prefer to fully restore my energy, rather than degrade day by day. The daily energy drain and strain of long distance backpacking must not be underestimated. This expenditure of energy must be fully offset to maintain our strength and mileage capacity over time and distance. When I say, "stay within yourself," and advise not getting past your "recharge point," I am talking about not expending more energy or straining yourself so deeply each day than you cannot completely recover with food and rest each night. Passing our recharge point every day makes us weaker every day we are on the trail. Loss of strength affects not just our ability to enjoy the experience, but our safety as well. Tired backpackers make bad decisions. Not paying proper attention to these factors has and will prove fatal. My approach to backpacking camp skills concerns what we need to consider to set up a camp that will keep us comfortable, happy and healthy for long distance backpacking across difficult conditions at high altitude in the High Sierras. We must establish and environment that not only protects us, but facilitates full recovery from the rigours of our daily hike. ConditionsWeather Thus the High Sierra Weather Section was built to provide excellent quick weather references for this trail guide while the High Sierra Weather page on the Forum takes a comprehensive view of the underlying conditions driving the power and character of each succesive season, as well forecasts and predictions. I've collected a few years of Annual Weather Information for your inspection on the Here's an entry about the purpose and use of the Calendar for PCT, JMT, and other hikers looking for the earliest start dates bringing clear trails and safe fording as Spring clears into Summer. As every year is unique, we compare the current year to the extremes of wet and dry against an, "average," year. Comprehensive current and past weather information gives us the best information about the basic range of tempertures and atmospheric conditions that will best inform and guide our gear selection. Currently we have three weather trends showing increasing frequency in the Sierra during Summertime, each with the potential to torment backpackers.
Accuracy of Short Forecasts Beyond the Forecast Limit The Sierra can and does occasionally experience very cold temps and powerful storms even during Summertime. The two-week backpacker will face three potentials beyond the forecast limit: The weather will either be colder and stormier than average, average, or warmer and calmer than average. A span of tempertures from low to mid 20s up to high 80s and low 90s are not uncommon during High Sierra Summertimes. A Season in a Summer on the Sierra Crest Though Special, these beautiful weather events can have catastrophic consequences for exhausted hikers who are under equipped for adverse weather and cannot snuggle into a warm, dry, protective shelter. Sierra Nevada conditions require we carry a water, wind, and mosquito proof tent. You don't have to use it, but if you do you will be glad you brought a tent. I have laid out the basics of my gear selection choices on the Backpacking Gear page. Changing Times Summertime rainstorms are common in the Sierra Nevada. There are two types, differentiated by their sources. The first and most common are the regular afternoon downpours and thunderstorms produced by Valley heat rising up the Sierra flank. These local storms are occasionally supplemented by real tropical storms rising out of the Gulf of Mexico or coming off the Pacific. Though the Summer Heat storms coming out of the Valley produce powerful thunderstorms with serious and sustained lightening strikes, these are a local phenomenon rising and falling on a daily schedule linked to the heat of the Sun. Tropical Storms & weather have become more common in the Sierra. Tropical Storm hits the Eastern Sierra Downpour on Kennedy Meadows Pack Station
Above: Summer downpour on Kennedy Meadows Pack Station along the Tahoe to Yosemite Trail during the 1990s. These Local Heat Storms form at around 2:30 every afternoon when triple-digit temperatures way down in the valley push a mass of superheated moist air up to the Sierra Crest. This trip rapidly cools the hot air mass triggering heavy rain, violent lightening, and resounding thunder. It will rain like the dickens and produce resounding thunder and spectacular lightening until the sun goes down. Though beautiful, the lightening can kill you. Danger-Danger
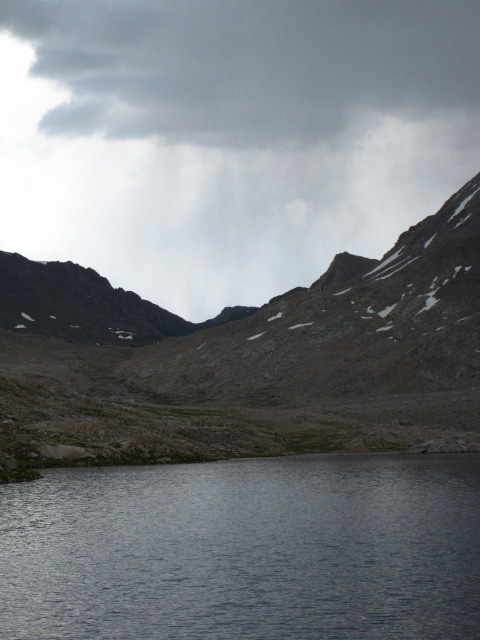
Shower in the John Muir Wilderness Above: Downpour in the Ionian Basin beyond Wanda Lake from the John Muir Trail. Hiking to the gap overlooking the Ionian Basin is a great scramble from the John Muir Trail, and the peak on the Right of the frame is peak 12960, which is a great little climb for the real adventurous John Muir Trail Backpacker... You do not want to get caught out in an exposed position as one of these storms form-up directly above you. It can be deadly for you. Rain Machine Below we can see thick clouds produced by Valley Heat pumping over the Palisades to the East of the John Muir Trail. We're looking Northeast after hiking South beyond the Golden Staircase and Palisades Lakes climbing up to Mather Pass. Hiking into the Clouds
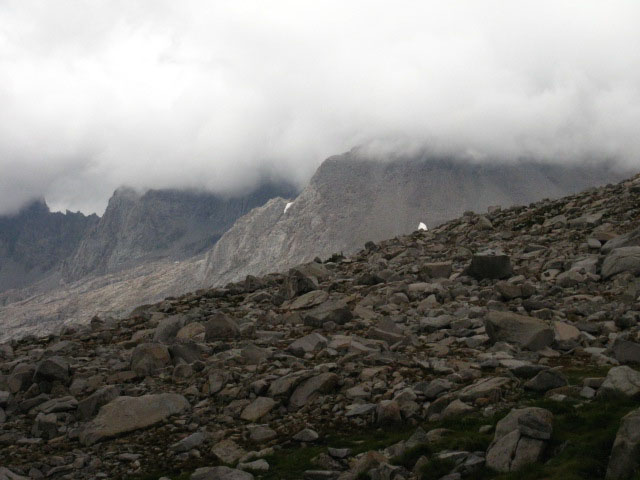
Above: Touching the cloud bottoms passing the Palisades South on our way through Mather Pass. Hiking through cold rain, grappule, hail, swirling winds, and 22 degree temps during an afternoon in August. These storms terminate at sunset on a daily basis. The storms end at sunset because the engine pumping the hot moist air up the Western flank, the Sun, sets, abruptly ending the day's storms until these conditions are reestablished by the build up of the Valley Heat Wave the next afternoon. Do not underestimate the level of support you must provide to keep yourself safe, let alone warm, dry, and comfortable when cold and wet conditions develop in the Sierra Nevada and persists for days on end. Having the gear you need is only half the battle. Good gear is only as effective as the person using it. ExperienceThough I am a great advocate of backpacking the High Sierra, I always urge all potential hikers to develop the proper gear, fitness, and experience necessary to deal with the hard conditions and range of harsh weather that can visit the Sierra during the Summer. Anyone can buy all the proper gear for a trip to the North Pole. Using it properly is another matter. Advice for Experience informs us about the proper gear selection our own personal sensitivities/capacities require for the range of conditions that experiences tells us we can potentially experience on any given trip. If you have a base of backpacking knowledge, you have to apply and adapt your experiences to cover the range of weather conditions you can experience along the Sierra Crest between Lake Tahoe and Mount Whitney. That is much easier than trying to develop experience as-you-go on the trail. No Escape The length of exposure putting us at risk also imparts knowledge of practices giving us our best chances of avoiding these conditions, and experience guides the good decision-making necessary to properly treat and minimize these conditions when they do happen. Add getting lost to this mix of physical challenges, then throw in an injury or two, and you can see why Death is a regular, predictable statistical outcome for American backpackers. Experience and proper gear can be the difference between Adventure and Disaster, between having the time of you life or losing you life. Conditions change rapidly in the Sierra Nevada. Exercising our abilities to accommodate radical changes does not just demand the proper gear. We require the common sense, the ability to keep a clear head, and enough experience to maintain clear observation and sharp analysis necessary to make correct decisions that keep ourselves safe from the range of internal and external threats we can fall prey to.
High Sierra Mountain Safety
Current High Sierra Hazards
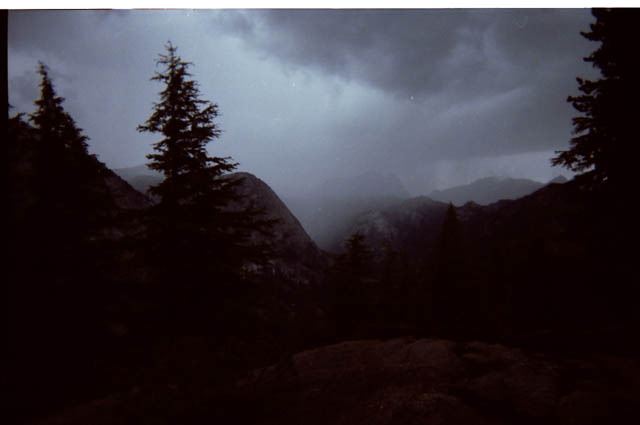
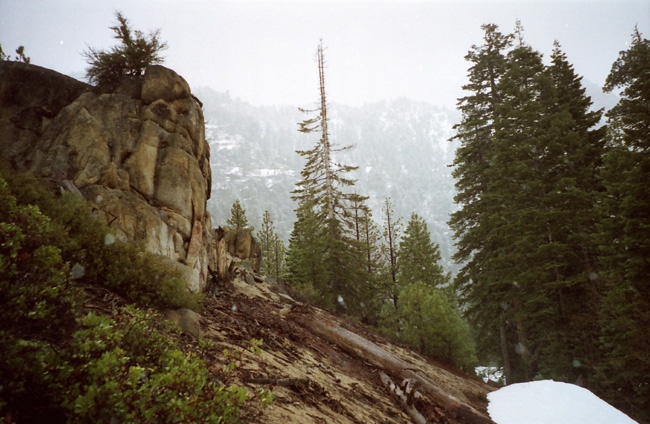
The Sierra Nevada Hiker's Seasons The High Sierra Hiker's Seasons are not determined by dates on the calendar. The wise High Sierra Hiker is guided by and geared for the potential as well as current conditions on the ground and in the sky. Trail conditions often do not correlate with dates on the calendar. Let the conditions on the ground, not dates on the calendar guide your trip expectations and gear selection. A great difference between the date on the calendar and expected conditions on the ground can be a clear warning of the potential for extreme changes in conditions. All High Sierra Weather Resources Wet and Dry The seasons can vary considerably from expectations and historical averages. Then they can swing back. For example, little snow fell during the whole Winter of 2012, and less during Spring. Record low rain and snow fell. These conditions opened the Pacific Crest Trail across the highest passes along the Sierra Nevada Crestline as early as I've ever seen them go snow-free. Reciprocally, on the other side of the Summer of 2012 these dry conditions initiated an early Fall. Dry Fall conditions almost persisted into Winter. This is exactly the opposite as 2011, when a super-heavy Spring snowfall added to an already super-heavy Winter snowpack to keep snow on the high trails through October. Heavy snow persisted above moderate elevations on North-facing mountain flanks through the whole Summer. One year had extreme precipitation, the next year almost none. Highly Variable Opening and Closing Dates of Trails and Mosquitoes The exceptionally dry Winter of 2012 was followed by a mild Spring. This lack of moisture brought weak Springtime mosquito populations which declined into oblivion during early Summer as the terrain dried. The normal "drop dead" date when most Sierra mosquitoes are dried out of existence happened two weeks earlier than the "average" dry out "drop dead" day, which averages out to August 15. The mosquitoes did not even drop dead during 2011, persisting through Summer into Fall. Each year, and every season during the year is unique. Each brings unique challenges. Backpacker Observations Each season generates its own very specific range of gear requirements. You must select the proper gear for the conditions. The Beginning The End Observing each year's unique evolution though its seasons is one of the standard and fundamental pleasures of life, and vitally necessary for properly planning and gearing for all backpacking trips. Backpacker Assumptions Only the Environment can do that. The calendar has often told me it's time for Summer Gear when conditions on the ground and in the sky tell me Spring Gear is still very necessary. Our job as backpackers is to interpret the requirements of each season and every situation, then meet them successfully. This requires some careful observation, considered reflection, and effective action. Day 1: Trail Clear
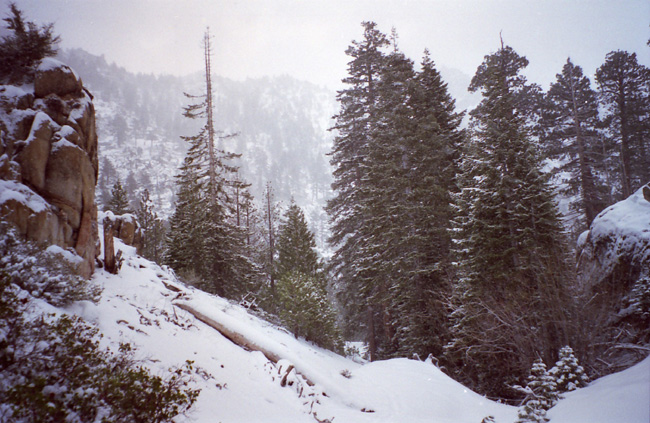
Day 2: Trail Obscured. Much colder conditions. Snow still falling. Increasing difficulties following trail route.
Above: These two images, taken a day apart, demonstrate how quickly conditions can change in the High Sierra Nevada Mountains. You Shouldn't start backpacking your backpacking career at the top of the Sierra Crest. Hell, you can start anywhere you want, and you may very well be successful (Tough and Stupid have a weird balance point...), but a logical progress of building trail skills and experience will bring more good outcomes than bad as your backpacking camp and trail skills develop through experience. Without proper camp and trail skills you will waste tremendous amounts of time, unnecessarily expend energy, and experience unnecessary pain for nothing. Do a few "Starter" TripsHarden Thyself Until you have the gear and experience to at least execute all basic functions comfortably on the trail, you should not wander too far from the backpacking locations in your own backyard. Porthole Gradualist This is especially true for kids and new backpackers. If you are just starting to backpack yourself, or you are an experienced backpacker introducing kids or novices to backpacking, don't throw yourself or them directly into the boiling water, so to speak. Bring yourself and your kids properly up to speed with some basic backpacking experiences before embarking on the High Sierra trails. Warm them up to higher mileages slowly. Before you know it you and your kids will be planning a Tahoe to Whitney backpacking trip tying together elements of the Tahoe to Yosemite, Pacific Crest, and John Muir Trails along the way. Soloist Warm your backpacking skills up by degree. I'll lay out an approach to gear, conditioning, trail planning, resupply, and of course Trail and Camp Skills that should benefit novice as well as experienced backpackers. I've got tricks, tips, practices and principals that work well. And I need to hear your tips and tricks too. Comments, questions, and information and tips are always welcome. The fact is that it's a good idea to have some good backpacking skills and experience under your belt before entering the difficulties and unpredictability of the Sierra Nevada. Campsite
|
|||||||||||||||||||||||||||||||||||||||||||||||||||||||||||||||||||||||||||||||||
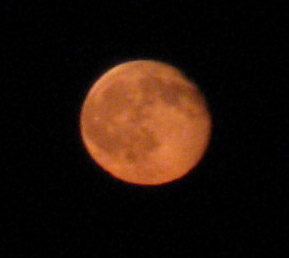
| . | The Moon from Donohue Pass. | |
 |
||
| Over a span of 40 days the changing nighttime skies never cease to amaze and entertain. |
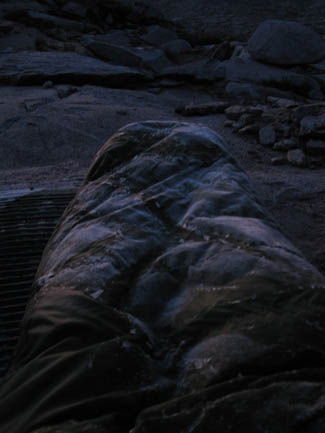
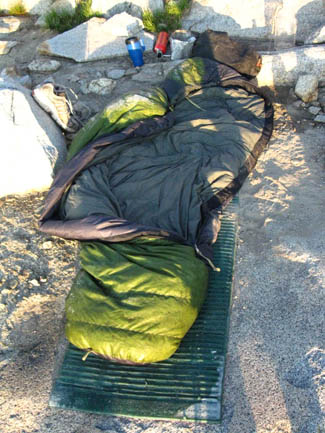
The Morning Evolution of an exposed high elevation campsite
| First light on Donohue Pass revealed a coat of frost decorating my sleeping bag. I don't mind. | Sunrise means it's time to dry out the bag. | |||||
 |
 |
|||||
| No big deal. I'm nice and warm on the inside of this 20 degree 2 lb REI down bag. | Always scrape the frost off your sleeping bag before the Sun melts it and drenches your bag. |
Above: Morning frost is scraped off before the bag is stuffed. I will completely dry it out later, during the first break. But a lazy morning allowed me to wait for the Sun, and Sun dry my sleeping bag before stuffing it. I only backpacked a bit past Island Pass that day, where I camped and spent the afternoon scrambling. No hurry out of camp that day!
TENT SELECTION
Water
Dew and Rain
Sleeping in the open makes you vulnerable to the full impact of the dew. Sleeping under trees significantly reduces dew fall on your sleeping bag or tent. Camping in the wrong place in relation to nearby trees during rainstorms can focus the runoff from the trees right onto your tent by air and by land. Make sure you are not in the path of either flow. I made that mistake once, with moisture from the air, in the '70s while camping on the Pacific Coast at Point Reyes National Seashore.
Lake Al
The runoff from three Douglas Fir trees joined together in high wind to direct a fire-hose blast of water at my tent. It was quite amazing. The force of the wind and water bent my tent evenly downward like the palm of god's hand was pressing down on it. The hydraulic force was so strong that water flowed right through the tent fabric, running freely down the walls of the tent, to pool on the low side of the tent's interior. I named the pool "Lake Al." The storm pounded the coast for three of my five days of costal backpacking. It was beautiful. I experienced similar circumstances during early Summer of 2009 at Lost Coast, when 5 days of rain included 3 days of fierce storms pounding the Northern California Coast.
The fact is that Nothing is Waterproof. Everything is wet after three days of driving rains on the trail. Everything we need to do must be done when wet. That's personally cool if our shell and insulation are keeping our wet asses warm and wind proof. This is why I prefer a larger tent during periods when multi-day driving rainstorms can come blasting off the Pacific during Spring and Fall. Having the extra tent space to air-out and move around is a real luxury during driving rainstorms.
Exposure to What?
Everything, to a rational degree, determined by our close observations and sharp analysis. Thus, we realize that all of our campsites are going to put us into a position with some greater or lesser degrees of exposure. What controls just how sharply the particular degree of exposure we are going to experience at any particular campsite, after the location itself, comes down to the season, the time of the season (early or late), and the "character" of this particular year's seasons. Has the weather been fierce? Passive? How have the trends and trajectories been moving?
What could happen?
High Sierra Weather Now & the Future
Gear Considerations
The Aspects of High Altitude Nature
How the weather is working is going to determine exactly what we will need in any particular campsite up and down the Sierra Crest. And, we know the high altitudes of the Sierra Crest trails are going to have colder cold temps, higher winds, colder rains, even Summer snow, along with the physical pressures of altitude and Sun exposure.
Camping under the forest canopy during a light rain will keep your tent dry during the rain, but then the trees will drip dry for hours after the rain stops. As the rains from the Sierra Heat Storms stop at sunset, don't set up your tent until after the rains stop, unless you want to get your tent wet for nothing.
Do not camp within the range of local snags. Snags are standing dead trees. I have watched a couple of snags break and come crashing down over the years. I have also heard snags crash down into the forest floor while camping. Don't camp within range of a snag.
Don't camp under large dead tree branches on live trees. They break off in the wind.
Don't camp under the drop zone of Sugar Pines. Their massive cones can do some real damage to a backpacker's head.
Don't lose your pack. Really. If it snows and your gear is spread out you will have a hell of a time finding it. If it storms and blows any gear not properly secured will depart.
Pack secured in Winter conditions

Massive Sugar Pine Cone
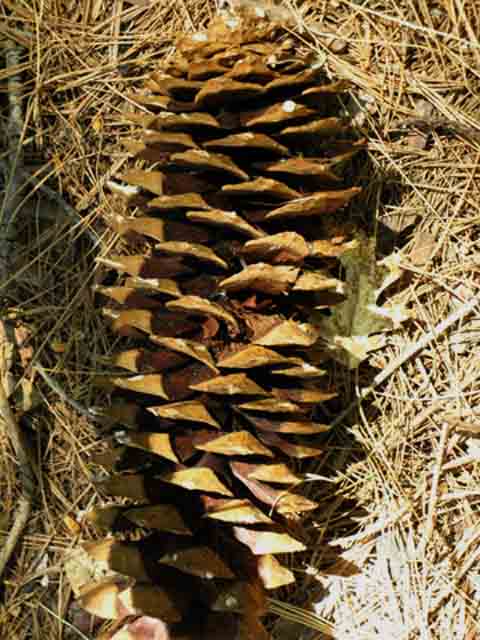
Above: A massive Sugar Pine cone. You don't want these falling on your head or gear.
Lightening
Don't camp, stop, or linger in open spaces during the afternoon lightening storms. If you decide to hunker down and set up camp during these afternoon Heat Storms, make sure you are in a well protected position. That means having lots of things taller than you all around you.
If you are high up on an exposed mountain crossing (an "aw, shit..." moment), get off the exposed face as soon as possible, or find a low spot in a field of boulders to hide in. The best option would have been to have observed the storm forming, and not put yourself into the exposed position in the first place.
Camping in positions exposed to sun and wind compromises the protection your camp offers to you, which will diminish your rest and recovery from the rigors of the trail. Yet many of the best campsites are up high and exposed. How do we decide where to camp?
After days and days of crossing exposed, wind-swept stark granite bowls that focus the sun like a reflector-oven on our heads, prudence may dictate that we establish a camp site that gets us out of the sun and wind, if at all possible. A good hat, sunscreen, and plenty of water along the trail are also vital to maintain energy over the short and long term.
Ultimately, the campsites we select should involve assessing the local possibilities; is there a high pass, a stunning high elevation lake, or a river valley near the end of your daily mileage?
The selection parameter should assess our physical status: Can we make it without pushing ourself too far or too hard? Next, it does it suit our physical status, which is a slight variant of the question above: Should I push myself to exhaustion to reach the high mountain pass campsite?
If we are weak, tired, and hungry it may suit us better to decide to set up a nice low elevation campsite.
I often intentionally camp in very exposed high altitude positions (weather and conditions permitting) to enjoy the peerless experiences and views these locations offer. If you are properly geared, have the experience to identify the conditions that are happening, and feeling fit and strong, camping at or near the highest passes along the Sierra Crest is a real joy.
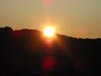
Muir Pass at Sunset beyond Lake Wanda
A Sweet View
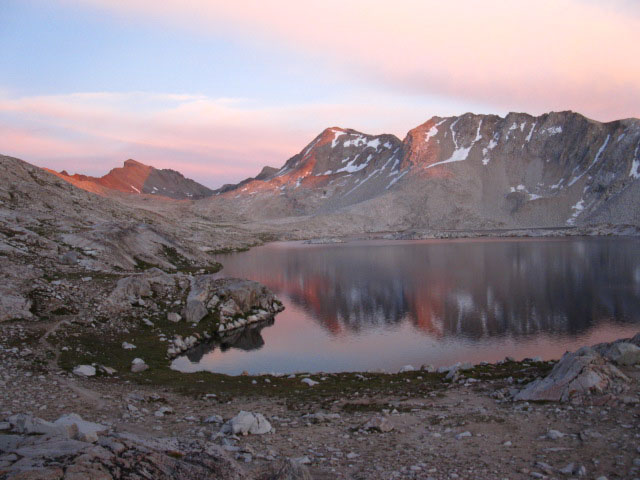
Above: Sunset on Muir Pass and the Black Giant behind the Pass on the John Muir Trail from my Lake Wanda campsite. Note the trail winding around the Left side of Lake Wanda. We can just make out the dark mass of the Muir Hut in the Right foreground in front of the Black Giant.
The North Flanks of Forester and Pinchot Passes both have nice high elevation campsites which come immediately to mind. The second Lake hiking South up to Pinchot has a real sweet site, if you hunt it down.
Impending Sunrise from Donohue Pass
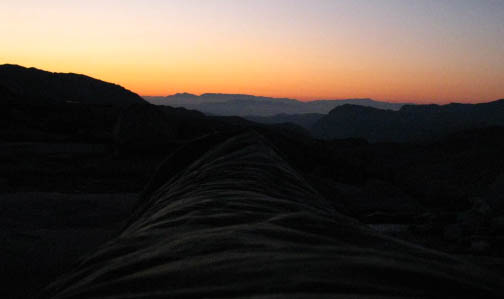
Above: Anticipating Sunrise from my sleeping bag, South side of Donohue Pass. How Nice.
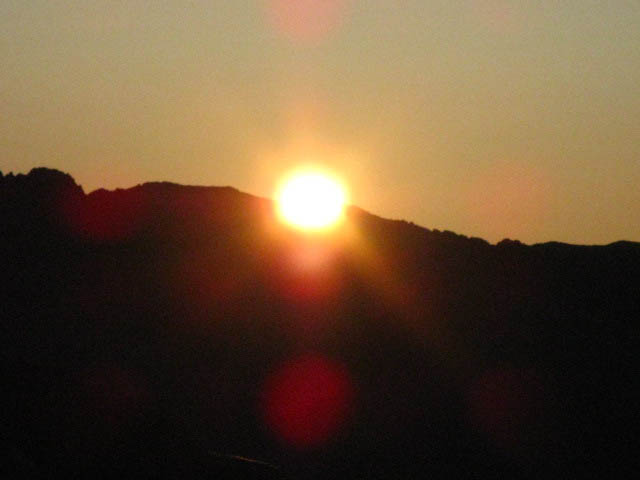
Sunrise from Donohue Pass
If you are feeling bad, weak, tired, or depleted you should camp in the lowest, warmest, most protected river valley you can find where the thick air and warmer temps will help recover your energy.
Timing
You must give yourself the time to find a proper location for a comfortable camp. Even if you say, "I'm camping at Smedberg Lake" on your hiking plan, you will want to give yourself time to scout about the lake to find the best location at Smedberg Lake to set up your camp.
For long distance hikers the best campsites are located on the Western Shore of the Lake, by the compass, where large flats of soft soils laying within granite channels make delightful campsites. This position is located on the most Northern point of Smedberg Lake by trail direction. Backpackers hike forward where the Northbound trail turns away from Smedberg Lake.
If you have more time, you will find the expansive Trail Crew main camp on the North side of Smedberg Lake, along with the ring of small individual custom trail crew campsites that always circle a Trail Crew main camp site.
If you are rushing down-trail until the last moments of sunset, (which I sometimes do) your will miss all of these potential campsites, and your choice and knowledge of local campsites along that part of the trail is going to be severely limited by your lack of scouting time.
You can take a hurried approach as long as you remain strong, and your priorities are focused on hiking high mileages rather than understanding the terrain and finding the best campsites nestled into this terrain. I figure that the guide will introduce the Sierra in detail for the first time to lots of folks who rushed through the Sierra on high mileage PCT trips.
I can count the number of PCTers who actually knew anything about the terrain they were racing through on one finger. And that's a symbolic finger, if you were wondering. Hey, I love you guys, and have made many trips down the crest to meet and greet you. Hell, I take your frkn pics, ask you about your experiences, and all of you who have met me during the past 10 years I've been carrying a camera on my hikes will see yourselves here. Eventually, as I comb through years of trips.
I like Pacific Crest Trail hikers.
But, rushing down the trail with your eyes glued to the trail is not healthy. "The PCT Shuffle" is hilarious. At least on this guide you have the time to soak in the terrain. For hikers planning their Pacific Crest Trail adventure this site will be your personal "keys to the kingdom."
The guide is designed to familarize Pacific Crest Trail hikers with the lay of the land sufficient to provide a deep context to compliment their on-the-trail observations and experiences, to get the most out of what we are looking at.
For the large percentage of PCT hikers who have little or no trail experience, the guide will let you see what you are in for. Forewarned is forearmed.
And people still wonder why I'm a heavyweight backpacker. I carry time on my shoulders, the time to explore, the time to scramble, the time to observe and engage, and most importantly, hopefully the time to understand.
Lightweight-smeightweight, that's what I say. The fact is that the depth of your potential to observe and engage the terrain over a given distance is tied to the weight of your food, gear, and fitness. Reciprocally, so too is the speed you can maintain hiking the Pacific Crest Trail tied to the weight of your pack.
This fact means that a successful PCT hike, or other serious long distance backpacking trips demand both speed and low weight. Both these factors seriously limit observation, engagement, and analysis.
When these divergent goals of long distance backpacking, which I characterize as "speed over weight over time" come into play it is wise to have the best scouting information available to maximize each factor of this equation.
I believe that observing, exploring, and knowing as much as possible about the terrain we are going to cross offers much more than the best campsites.
If we take a little time to carefully observe the terrain and line up our map with the local features we get a "feeling" for how the trail fits into the character of the local terrain, its logic, and how the local terrain fits into the Sierra landscape, which characterizes a slice in time in inextricable expression of grand forces. We will also be able to identify and note locations of potential scrambles and cross country routes for the present and future trips.
Exploration, days off, and safety are the reasons why I advise taking an extra day's food on each section between resupply points. This gives us the "slack" to take the time while hiking the long trails to explore and learn as much as we can about the local terrain and nearby resources as we hike between the mountain passes which naturally divide the terrain.
Each area has an infinity of terrain and experience within.
I found the nice camping at Donohue Pass pictured above, and the lake surrounded by golden sand and a unique boulder field sitting to the West of Donohue Pass, (picture coming) by scrambling the off the trail one backpacking season, and then putting the found lake on my camping and further exploration list for the next season. Carrying the extra pack weight gave me the flexibility to explore to find this cool place.
On the other hand, if you are a moderate to low experience backpacker who is going to hike through the High Sierra at a very fast pace once, as is the average Pacific Crest Trail hiker, you are going to need the best information possible not just to get the most out of this unique experience, but to understand the lay of the land to best ration time and energy for safe and effective travel.
Knowing the terrian allows us to use our energy much most efficiently.
And this trip, be it from Mexico to Canada, Tahoe to Whitney, or Sonora Pass to Tuolumne Meadows is going to test your endurance.
The bottom line is that we should always be monitoring our level of fatigue against the potential for bad weather against our clothing's level of protection and insulation. Subtract from this grim math our campsite's sheltering potential, all to make sure our total provides the degree of shelter necessary to keep our energy and warmth levels within our body's recovery capacity.
Our recovery time is the time it takes us to recover completely from hiking a section of the trail. Say we hike up the North Side of Glenn Pass at a given speed, drop down past Bubbs Creek, and begin climbing up towards Forester Pass.
At a certain time we are going to need a break. If we fail to take a break when our body needs one, we will start passing through our recovery time, which means we are not just burning energy through our muscles, but that we are depleting the muscles themselves. We will have to take time to recover from this depletion, or we will weaken to refect this depletion during our time on trail.
It works like this: for every "X" amount of miles anyone hikes, they are going to need "Y" minutes of recovery time. The further a hiker push their number of miles over and past their required recovery time is going to result in a daily increase of metabolic fatigue and associated decrease in strength and endurance.
Add to these metabolic stresses the stress of the impact on joints; ankles, knees, and hips. This impact stress on joints builds up over miles, over trips, and over seasons. Then add to all of these stresses the stress on your feet. Your feet are very complex, containing an orchestra of bones, muscles, tendons, ligaments, and nerves.
Hiking past your recovery point is dangerous.
When we start hiking beyond our recovery point we are not just draining our batteries on the trail, which is never really wise, but we are consolidating the stresses on our metabolism, our muscles and soft tissues, and our skeletal structure into an overall situation of fatigue. Each of these stress points is individually capable of stopping and dropping us on the trail. We can literally run ourselves into the ground by not taking the proper breaks to recover our energy. From hitting the point of fatigue trail dangers increase rapidly.
Bad Body, Bad Brain
Tired hikers are much more prone to make flawed assessments of their situation, to make bad hiking and direction decisions based on these flawed assessments, and subsequently have more accidents.
Even without accident or injury the fatigue scenario eventually forces tired backpackers to take extra time off for recovery, and considerably more time to recover than if we stayed within ourselves while hiking the long trails.
The Walking Wounded
This brings me to my encounter with a John Muir Trail hiking team out of Fresno. I was sitting at Vermilion Valley Resort eating and drinking AMAHP (as much as humanly possible). I observed four dudes hiking in. That in itself is strange, as most JMTers boat in on the ferry. I walk in from the JMT, and am generally the only one. But now there were five. Me, and this foursome.
Humm. Observing more closely, I noted that each hiker had a limp. One was walking on a bad hip and foot, another had two real bad feet, the third had blisters on both feet, and the fourth hiker looked tired, but was walking with a clean gait.
I could see all of this by how they were stepping. Their gaits gave away the locations of their pain. Despite their infirmities, they were on schedule and doing the required daily mileage that their hiking plan called for.
They were the "Walking Wounded," as I christened their team. They wore the name well. Because of my previous experience with injury and pain, I was a good advisor.
I showed them the tape and bandage wraps that would hold their joints together, and their blister protection on their feet. I gave advice on rest and recovery that required them to kick back for an extra day to recover. And I thoroughly enjoyed their company at Vermilion Valley during this time, good dudes all.
In any case fatigue increases all the dangers on and off the trail.
Our goal is to consider all these factors to come up with the best plan to organize our gear and food to create a high mileage trip that observes, engages, and understands the terrain within a reasonable degree of safety.
location
Remember that river valleys and rivers act as conduits for cold air to flow down mountain during the evening. This air can be moist, and completely wet your sleeping bag if you sleep out, or your tent if you tent-up. Having some trees or boulders deflecting potential cold and moist evening air flows might be a consideration, depending on your specific circumstances. No reason to pack up wet gear unless you have to.
The Sierra sometimes experience heavy dew falls. Camping under the boughs of a tree can diminish the dew fall on your bag or tent.
Sleeping Out in Evolution Valley, John Muir Trail
Above: Evolution Meadow bringing down a heavy dew fall followed by a heavy frost. After this pic I scraped the frost off the bag. Note how the backpack is half-saturated, and half-frozen.. Note too how I never use a "pack cover." Why anyone would buy a backpack that needs a cover is way beyond my understanding. If the pack is not waterproof, please do not buy it! My pack is only wet on the outside. It will dry. Exactly the same is true of ground-covers for tents. I don't use tents that need a diaper to sit on the frk'n ground.
If you have a planned sequence of campsites along your trip route make sure that they are fitting into the daily distances you are capable of sustaining. If you are getting more tired each day, you are going to have to start figuring out ways to alter your approach to reduce the fatigue, or change your distance between campsites.
A good strategy is to hike one of your daily mountain passes in the chill morning air. If you are sleeping in, you also are missing the benefits of hiking in the cool air of early morning. You will save a tremendous amount of calories and physical stress by doing one of your big daily climbs before the sun and the temps rise.
Make reasonable plans for your daily campsites, monitor your ability to maintain your planned pace, and modify your plans and pace to suit the reality on the ground that you are experiencing.
Every day you should calculate the food, total distance, daily distance, and number of days remaining in your trip and adjust these factors as necessary to accommodate both your personal as well as impending terrain and weather conditions.
When the game is on, you must constantly calculate the odds.
Water-Sanitation
It is vitally important to have easy access to water for hydration, cooking, and sanitation.
Running water is also one of the delightful standard background melodies, one of the sound tracks of the Sierra.
My water system is simple and logical. I never filter water at the creek or lake. I always pack a lightweight gallon jug. I fill this jug at the source, and bring it back to camp. The reason for this is simple.
Most water used in camp is for cooking or cleaning, neither of which requires filtered water. I throw my filter's intake hose into the jug, and set the filter on a stump or boulder for ready fresh water. Otherwise I am boiling water for food and hot drinks, which negates the need for filtered water. This strategy eliminates over half of your filtering.
Break-time: Time to Refresh Drinking Water Supply for next section of the trail, re hydrate myself, and boil up some coffee and soup.
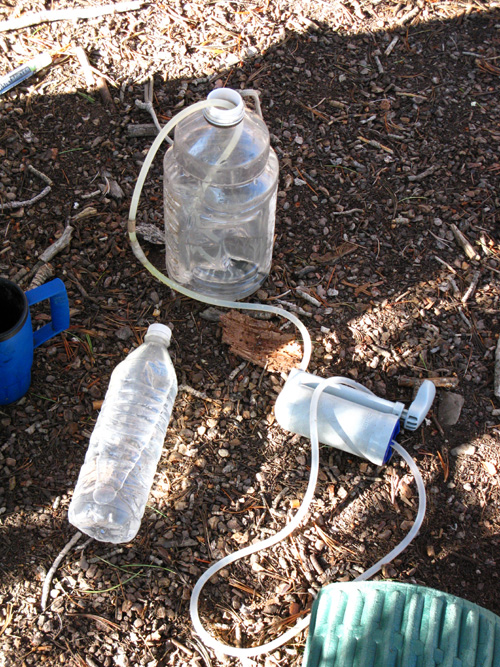
Above: Water jug set up to only filter the water I am drinking and collecting for upcoming trail section. Cooking water is left unfiltered. Note my seat pad, being my sleeping pad. This break includes a comfy seat, tasty treats, easy access to fresh water, and a cup of coffee-hot chocolate.
In recent years backpackers have wised up, and started using collapsible water totes, rather than wasting time filtering all their camp water when they are going to bring at least half of the camp water to a boil making hot drinks and hot food.
I don't like the totes, 'cause I can't take camp showers with a tote. I like my light weight plastic jug. My plastic jug can be sealed to carry extra water along the trail, or across rough terrain, as well as being easily used for remote bathing.
| Water Systems: The "Alex." |
Discovered Advantage of Jug System: Fire Control & Suppression |
Member's Favorite Water Systems
| Mountain Safety Forum |
Backpacker's Forums |
Drawing from low flow water sources
You may find yourself in a situation where you need water badly, but the water source is so feeble that even putting the intake hose of your filter into it will destroy it.
Check out my method for filtering from small trickles and springs on the "lay of the land" section of the Raymond Lake to Ebbetts Pass guide page.
Sanitation & Camp Mosquito Protection
Hiking the Sierra during the Summer often requires vast amounts of Sweat, Suntan lotion, and DEET. This in turn requires a good sanitation system to make the transition from trail to camp. I want to remove all DEET and suntan lotion when I make camp, if my camp is sheltered from the Sun. I want to remove the DEET in any case.
Mosquito Conditions
The amount of camp mosquitoes you experience is going to be determined by the season and location of your camp. Camping in early Spring near a wet meadow is going to test your mosquito protection skills. But you may not be safe from mosquitoes in high elevation basins much later in the season.
Many high basins contain amazing blue lakes surrounded by vibrant green grasses. The problem is that this beauty is sitting on solid granite base covered with a thin layer of rocky soil that's been eroded from the surrounding granite.
The solid granite floor under laying these high granite basins drain poorly. These granite basins will hold moisture long after the surrounding mountain terrain has dried out, feeding massive concentrations of mosquitoes inside these beautiful granite bowls long after the populations in the surrounding terrain have diminished.
Watch out, Beauty has a Bite.
The Emigrant Basin is just such a place. This video recorded a full massive mosquito attack when I hiked through during August of 2010.
These conditions demand camp and trail mosquito protection strategies. Your choices are fairly simple: Chemicals or Clothes. You can use chemicals or clothes for mosquito protection on both the trail and in camp.
But each strategy has benefits and drawbacks, which I discuss in the "Mosquitoes and Seasonal Temperature Shifts: Backpacking the High Sierras" article on the Backpacker's Forum. Check it out, and add your two-cents worth.
I select less clothes and more chemicals on the trail, and more clothes and no chemicals in camp.
Coming off the trail to set up my camp requires procedures. First I locate camp. I drop pack and stash food. Second, I obtain my camp's evening water supply. Before toting my water jug back to camp I use it for a remote shower.
The first gallon of water that goes into my water jug from the local creek or lake is to wash myself with. Fill the jug, find a good spot where your rinse water will not foul the creek or lake, and rinse the DEET, Suntan lotion, and Sweat off your body.
At this point you can now safely rinse off in the creek or lake, if the conditions are warm enough. Sierra waters run very cold. If you are rinsing your shirt and pants out every day, now is the time. As with your body, rinse out your clothing far away from the water source. Your clothes will have soaked up the chemicals you applied during the day.
Dry off, then make the transition to camp clothes if you washed your hiking clothes. I hike the trails in shorts and a tank top during the Summer, while mosquito/cold protection in camp requires a long shirt and long pants.
If I am rinsing out all my hiking clothes, I am changing into my fleece layer for the evening's camp clothes, as my trail clothes are now hang drying.
If I am not rinsing my hiking clothes, I zip the lower legs onto my zip-to-shorts pants, and tuck the pant legs into my socks. I recently added a lightweight loose fitting tight weave white cotton long-sleeved shirt for mosquito protection to my clothing selection.
Until I bought this cotton shirt I had relied on my long-sleeved fleece coat for both insulation and mosquito protection in camp. But the heavy-heavy mosquito populations during the Spring of 2010, combined with a heat wave, convinced me that adding the cotton shirt for camp and trail mosquito protection was a good idea during this very heavy, very hot, mosquito year of 2010. The fleece was too warm for the conditions.
A pair of fingertip-less gloves, to allow for cooking, writing, photos, and other camp tasks generally tops off my base layer of clothing for camping. I tuck the sleeves of my shirt into the tops of my gloves. Every piece of your clothing must be securely tucked into its adjacent pieces to provide a complete seal against the mosquitoes.
To protect my head, face, and neck from mosquitoes in camp I use an elastic head net that fastens from my hat's brim to the collar of my long sleeve shirt. Extra layers are added as needed as the evening chill deepens.
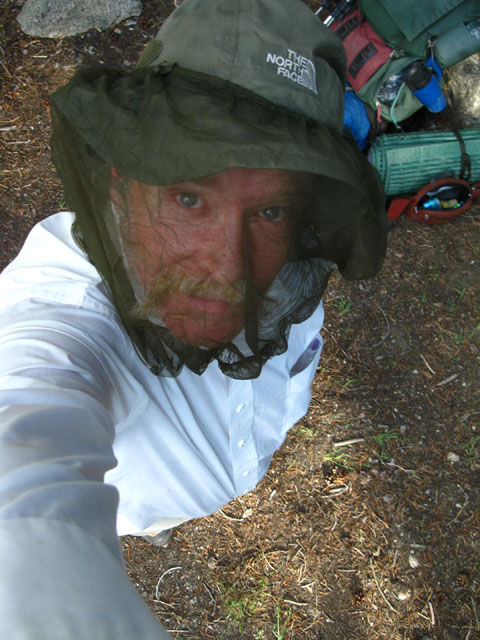
Above: Ready for full mosquito attack at the Silver King Creek during July of 2010. Look at that new $3 Mosquito-Proof Salvation Army shirt: I'm the best-dressed backpacker on the trail! Or a waiter who wandered into the mountains...can I take your order, please?
Dressed-up in this gear allows me to be mosquito-free in camp without wearing any DEET. My mosquito strategy is chemicals on the trail, clothes in camp.
Other Sanitation Considerations
Teeth
For tooth care I bring a small travel toothbrush that fits inside its own protective case, and a small travel tube of toothpaste.
Hair
To keep my hair from dreading-out I pack a regular plastic men's comb in a case. I send myself travel bottles of shampoo and small bars of soap in my resupply buckets for use at the resupply point showers.
Towel
I never carried a towel until recently. Now I sometimes I bring a piece of backpacking towel, which I have found pretty handy. Spiedy-man Joe lost his towel before I met him at Tuolumne Meadows in 2009, and asked if I wanted to divide one with him, which I did. I have found this little bit of towel handy, but not necessary.
Emergency Hand and Ass Cleaning
I also bring a few individually packaged large alcohol wipes and a small backpacking bottle of moisturizer.
Cleaning the Cooking Pot
I use one pot for all my hot food and drinks. Oatmeal for breakfast, ramen noodles or soup for lunch, and freeze dried dinners in the pot are all followed by a cleaning process that maintains sanitary cooking conditions.
After meals I clean my cooking pot with any available sand, mixed with a bit of water to scrub off the food debris. If no sand is available I use bits of sticks and small rocks mixed with water. After rinsing the pot I boil water for my after dinner Hot Chocolate, which sterilizes the pot.
Too many people
Screw the blue bags. I am never carrying shit in my backpack. If we have to do that I will not shit when I hike through such zones (such as the Whitney Zone), or just stay away from any location that is so overcrowded that it cannot absorb our impact.
I would call nature overflowing in shit the proverbial "canary in the coal mine," so to speak...
I vote for a quick population reduction, and I call for an end to the stupid policy of endless irresponsible population growth. We have grown beyond our Natural and Social infrastructures, we have grown beyond the limits of our own general welfare and mutual responsibility, and we have severely damaged man, nature, and our country.
We have "grown" to the point we are drowning in our own shit.
Enough is Enough!
We must take the pressure off of the tattered remnants of our Natural and Social resources in California, and the rest of the United States before we completely drown our country in Shit.
The Hole Thing
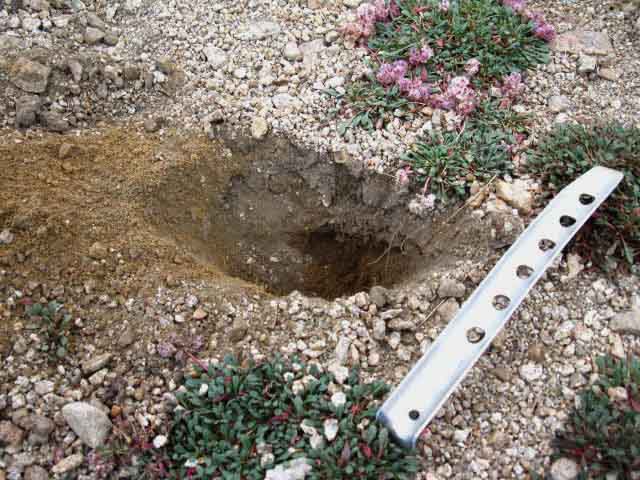
If nighttime temperatures are freezing, or the ground is hard during early Spring and late Fall, dig you crap hole the evening before while the ground is still soft before the evening freeze. In many locations you will be unable to easily dig through frozen ground in the morning.
Tip: Throw away the worthless orange plastic hand trowel, and buy one 8" long aluminum snow stake. The aluminum stake is lighter, stronger, will not break, and will dig through rocky soil that would snap the plastic trowel like a twig.
Never leave toilet paper out of the crap hole. A message to you idiots who do, you better hope I never catch you, you filthy bastards. I will crown you with it...
Push your toilet paper into your crap with a stick so it is fully submerged, refill the hole, pack down the earth as firmly as possible with you foot, restore the surface character of topsoil, then place a good sized rock atop the position to prevent any varmints from digging it up.
I've developed a technic to shit in snow that completely flushes out the crap hole long before the thaw can deposit frozen turds on the terrain.
When you arrive at your campsite in late afternoon the snow is going to be at its softest. This is when you dig your craphole for the next morning. Trying to do this early in the morning is misinformed. Hard frozen snow makes this a problem, if not impossible.
Using an eight-inch snow stake, make a hole in the snow about 6 inches across and as deep as possible. Carve a cone around the central hole up to a foot in diameter around the central deep hole.
The next morning, crap in the hole. Now here's the key. Make sure the crap is down in the center of the hole with a stick no larger than a half-inch in diameter. Push your toilet paper into the shit with the stick. Then stick the stick into the center of the crap. Now fill up the hole and cone around the hole with snow, and stamp it down lightly around your projecting shit-stick with your boot.
Now we are going to take a number of twigs and sticks, and push them into our buried shitpile through the lightly-packed snow at a variety of angles that compliment the cone we carved around the central shithole, each with their tips sitting above the level of the snow.
Now Nature gets tricky. When you carved your hole and cone the evening before you shit in the hole, this "hole and cone" structure froze hard. After covering your shit with snow and poking it full of sticks, you have just created two layers of snow: The lower level, the hole and cone, and the upper level, composed of hot shit poked with sticks, sitting under loose-packed snow. What now happens during rising temps is the key to making this a sanitary shit.
As temps rise, and the sun shines, all things wooden pick up infrared radiation and re-radiate it as heat. Snow around wood melts long before the general snow cover. The sticks perforating our shitpile collect heat, melt the snow within our cone, and start "flushing" melt water down our shithole. The harder layer of cone and hole, cut the evening before our morning shit, now stands-up as a guide for the stick generated melt water.
I have crapped in known locations in Fall snow, mid-Winter snow, and Spring snow conditions. I have returned and surveyed all these sites directly after the Spring Thaw has cleared the area of snow. The result has been consistent: No indication of shit or paper has ever survived my thermal snow toilet.
Ass Care
You ass is one of the fundamental three things that keeps the long distance backpacker stepping happy down the trail: Keeping Your Feet, your Stomach, and your Ass all in fine shape are vital to preventing severe pain from kicking your ass and ruining your trip.
I deal with keeping your Feet and your Stomach together in different parts of the Trail Guide and Forum. Here we will deal with preventing Ass Rash, a terrible blight on afflicted hikers.
If you have ever had Ass Rash you will never want to have it again. Imagine the pain of blisters transported to you butt. The main cause of ass rash is not properly cleaning your ass, or plain old friction.
Proper Planning, Proper Supplies
First, you must bring the proper amount of toilet paper along. Sure, you survivalists can wipe your asses with rocks and such, but not me. I rely on proper planning and packing. For me two arm lengths of TP are brought for each day on the trail, and less is used as possible.
Second, your ass must be shit-free when you are done. The smallest remnants of feces will act like sandpaper over the length of 15 miles, or whatever distance you are doing each day, and the pain will increase with each step you take while reducing the distance you can hike each day that Ass Rash continues.
Third, if you have a hairy ass, shave your ass. Hair near your asshole holds feces. You will never get your ass "trail clean," butt rash will be a constant threat, and you will require twice as much toilet paper.
Outbreaks of Ass Rash can be easily prevented by packing a small backpacking bottle of baby oil on your trips. A few drops on the paper of your last wipes will breakdown and remove the smallest traces of remnant feces on your butt.
The baby oil will also condition your skin to prevent dry skin and prevent basic friction rashes from breaking out, for those of you who are sensitive. Baby oil butt is a good preventative for Ass Rash.
Once you get Ass Rash
Once you get Ass Rash you are going to suffer. No changing that. But you can reduce the time you are going to suffer by speeding healing with good treatment.
I treat Ass Rash by adding an application of Neo Sporin or another white petrolatum based jelly antibiotic cream such as Bacitracin, after the final wipes with the baby-oiled TP.
VASELINE or other lubricants can be used as a preventative, but they do not protect against infection once Ass Rash has set in.
For an extra layer of sanitation I bring a few individually packaged large alcohol wipes. These can be used to clean your ass or your hands if things get messy.
Chapped Inner Thighs: Female specific
Some women have inner thigh skin that rubs together when they walk. I have seen some ugly inner-thigh rashes. If your inner thigh skin rubs together when you walk you may want to consider adding a moisturizer/lubricant to your first aid kit, and make sure you have plenty of neo-sporin or other antibiotic creams with lubricating qualities.
I've been informed of a feminine product for hikers that simplifies the monthly bleed. It is a diaphram-like shield that holds the blood at bay. Hiking chicks can remove it after the daily hike to drain. It can be sanitized and reused, eliminating refuse... Leave no trace!
But I'm not sure that this simplifies things for long-distance backpacking chicks. You will need a sanitation kit that makes life as easy as possible. In any case, the monthly cycle demands that female hikers make significant considerations and proper plans to deal with.
I'm not qualified on this topic to offer gear suggestions as I would with boots or stoves... except to urge you to make sure your approach works as planned by testing it out in a safe environment before you bring it to the mountains.
Shelter-Protection
Tent vs Tarp: The Classic Conflict.
Tenting vs Tarping is one of the classic divisions in backpacking, as are the arguments between those who use "hiking sticks" and those who call them "idiot sticks." The tarping conflict is akin to the spat between the adherents of internal framed pack against those of the externally framed backpack.
Oh, the arguments are endless!
Tarping takes this a step yet further than argumentation: Tarping and tarpers are like a religious cult. Tarping either appeals to some deep sensibility in hikers, or it does not.
Beware Simplicity
I believe it is the "simplicity" sensibility. And the "skills" sensibility. I love simplicity and skills. Tarping appeals to hikers who favor simplicity and skills with cord and canvass. Well, nowadays it is parachute cord and plastic tarp elements. But what about practicality? I love practicality.
Practically speaking, I do not put up a tent unless I am defending myself against weather, mosquitoes, or serious fatigue. That's practical, and I like it.
By my measure, if there is no weather or mosquitoes you don't need either a tarp or a tent. But when you do need protection against weather and bugs only a tent will keep both at bay when either arises: Tarps let both mosquitoes and moisture enter your sleeping area. Not acceptable. Not practical.
Simple solutions must solve practical problems. Tarps do not.
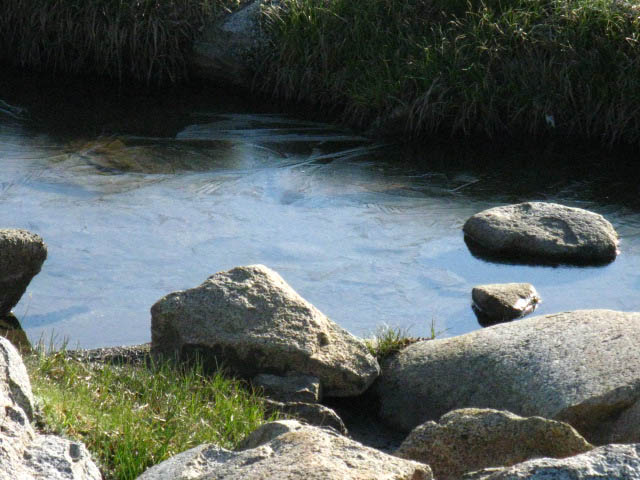
In my opinion you are best served by a tent. But that's up to you. Erin was quite happy with her tarp set up during an afternoon rainstorm during her trip from Lake Tahoe to Yosemite Valley during the Summer of 2009.
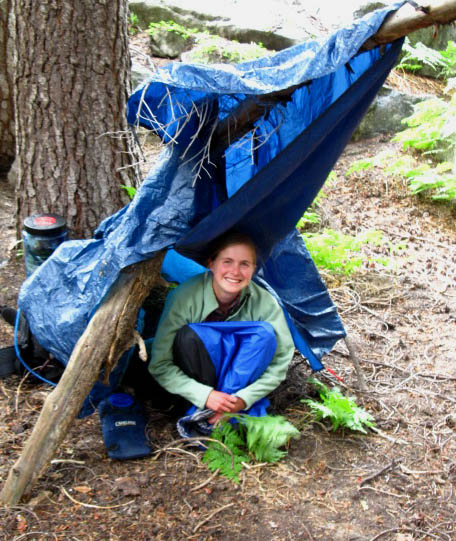
Above: Erin under her Tarp on the Tahoe to Yosemite Trail, Stubblefield Canyon. The afternoon storm would clear at sunset.
Simplicity: My tent spends most of the year's backpacking seasons as my pillow. As my pillow my tent is always right at hand for quick deployment, as necessary.
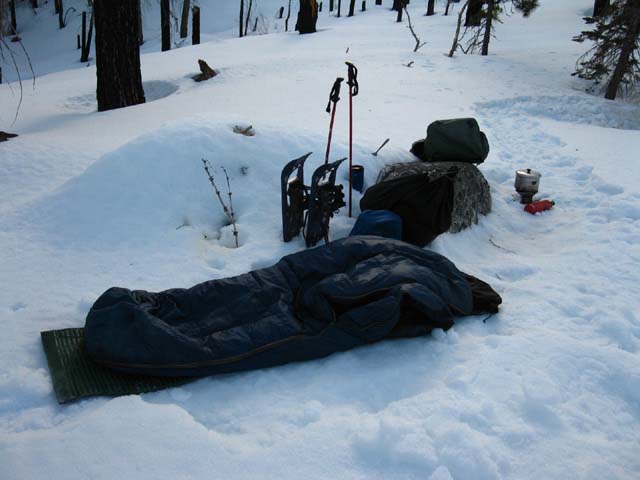
Above: Mid-Winter campsite at 7000 feet, heading higher, and heading South out of the Lake Tahoe Basin via the South Upper Truckee. My tent was used as my pillow...
Tarping protects against neither mosquitoes nor hard rain during Summertime. Swirling winds will carry raindrops under and around the tightest tarped setup into the sleeping area. Mosquitoes will follow your scent on the air through every flow of air circulation into the sleeping area.
I don't need either.
My tent is a tad bit over two pounds but is totally effective against mosquitoes, rain, wind, and I can make the little bastard actually hold heat, especially during Wintertime.
Though a tarp and cord setup weighs considerably less, it offers considerably less protection. I am bringing a tent into the mountains for full protection when I need it.
When I need cover from mosquitoes, rain, winds, or just a tight shelter to rest-up and warm-up within I need a solid tent. Right now I'm running two tents that are no longer on the market.
One Person Tent
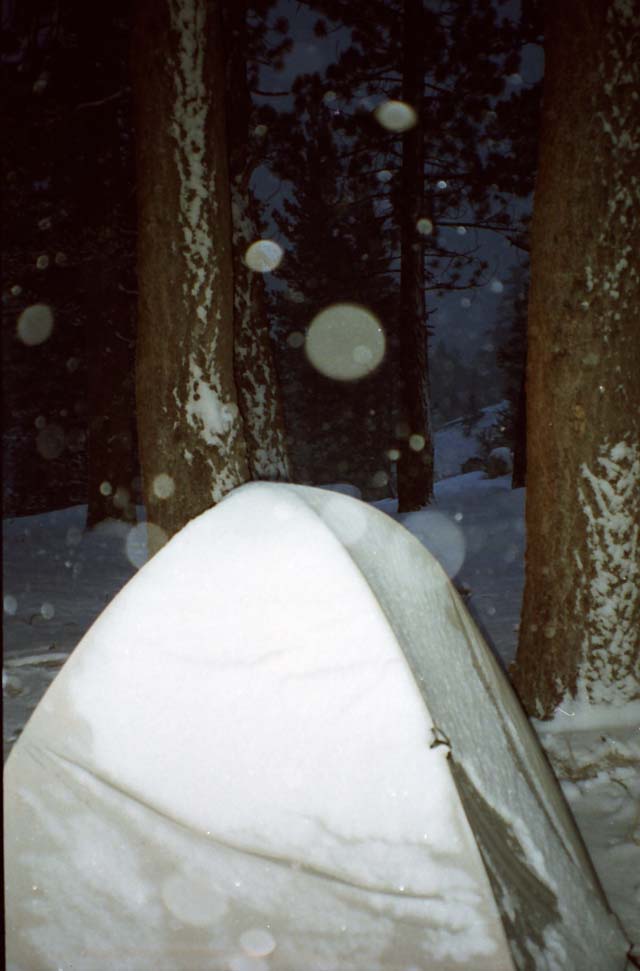
I have an old Walrus Micro-Swift (see it without its fly cover on this page's banner) tiny little one man "coffin tent" that weighs in at a tad over two pounds when geared up for Winter use. You cannot sit up in this tent. That's a major drawback if you get snowed in.

Above: Walrus Micro Swift after Winter Snowstorm. I shook the tent and broke off the snow cover before snapping this picture. The snow cover over this little tent allowed me to maintain 40 degrees in the tent during a 19 degree night of snow flurries. Note the pre-positioning of the stove from last night's dinner to allow me to also cook breakfast and boil up some coffee from the sleeping bag.
I use this tent for all seasons except during predominantly rainy weather. I can cook under the atrium laying on my stomach in the Micro-Swift, as the picture above shows. This is a no-frills tent that offers excellent shelter in all conditions. It's small surface area and low profile hold heat and avoid the wind better than taller and wider tents.
This tent is easy to bury in the snow or hide behind a boulder.
This tent is not made for extended stays in the tent. I've been stuck in this tent during a Winter Blizzard, and it was a real trip. You really feel like you are laying in a coffin when the snow puts you just two feet under!
I devised stretches to keep me limber and sane, enjoyed a good book, and hit the "trail" as soon as the storm diminished enough to allow me to dig out. If you are claustrophobic, this is not the type of tent for you.
But this type of tent reflects my approach to tents: Ultra light, ultra protective, and only used when necessary.
Thoughts on Backpacking Tent Selection
Member's Favorite Backpacking Tents
I also have an old school REI Half Dome two-person tent. I rarely backpack with a second person, but I find certain situations where a two person tent is much preferable to a one person tent.
I mostly use the Half Dome two person tent for Spring and Fall backpacking during rainy conditions. I prefer to have the space of a two man tent when I am backpacking in the rain. There are many reasons for this.
Camping in temperate rain forest at lower Lost Coast, the State Park
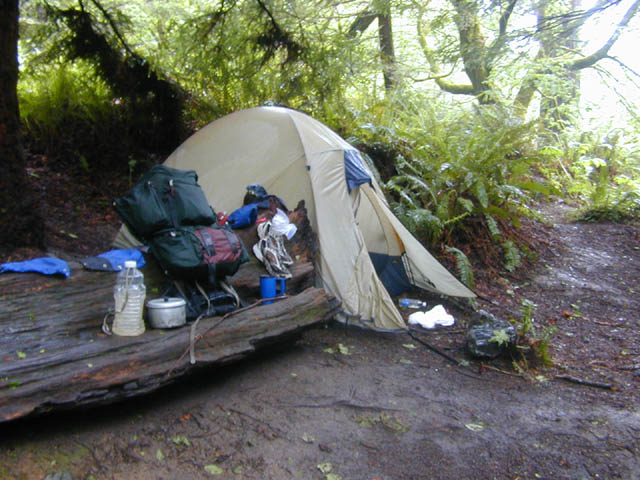
Above: Everything is wet, except the inside of my tent, at Lost Coast in early June of 2009. I went through the biggest storms recorded for the dates I hiked through.
Removing wet clothes is so much easier in a two man tent than a one man tent that this fact alone is worth the extra weight of carrying a two man tent. Using my Micro-Swift in rain requires I remove my shell and all unnecessary clothes before entering the tent. This is not such a problem in a snowstorm, but is a real drag in the rain.
Wet gear sticks to your skin, and is hard to take off and put on. Taking off or putting on wet clothing in the Micro-Swift is almost impossible.
Not so with the Half Dome. I can remove my rain shell from outside or inside the tent, depending on which I prefer. There are also other advantages to the two man tent during rain camping.
Being able to sit up and cook under the Half Dome's atrium during days of driving rainstorms is also a big plus, as is the ability to run a parachute cord "rack" across the top of the Half Dome tent, to air out and store gloves, socks and rain gear.
Gentle Winter Snows fall on the Half Dome
Above: My old-school REI Half Dome doing Winter Duty at the Carson Falls on the East Fork of the Carson River.
Internal vs External Pack Frames
My Way
My approach is simple: Long distances and any heavyweight backpacking requires an external framed backpack to properly carry and distribute the load. My basic pack is an old-school external-framed pack.
Exceptions to this are Winter backpacking, Speed backpacking, and trips that involve substantial scrambles and cross country elements. These activities demand the heat retention or closer center of gravity offered by internal framed packs.
External Frame
For basic long-distance Summer backpacking I prefer an external frame because it separates the load from my body for colling, while at the same time precisely controlling the distribution of that load.
The separation of the load allows air circulation and cooling, which I find to be the huge advantage of external framed packs during the Summer.
During any season an external frame provides a more stable platform for suspending a very heavy backpack load along trails. But there are times you do not want to carry a heavy load on an external framed pack.
Internal Frame Packs & "Optimal" Gear
During Winter cold I consider the extra warmth preserved by the close fit of the internal framed backpack as much of a blessing as it is a curse during Summertime. The lake of sweat at the base of my back below the wet T shirt up to my shoulders during Summertime becomes a pleasant warm spot during Wintertime.
Additionally, the close fit of the internal framed pack keeps the load more balanced over the irregular and unstable snow surface. The ability to fit your load closer to the center of your gravity is an advantage during snow travel and while crossing rough terrain on scrambles, cross-country routes, or along un maintained trail routes.
Besides providing warmth during Winter use, an internal framed pack's utility over cross country and unmaintained routes is undisputed. Having the load tight on your body for a closer center of gravity is a real advantage. Anytime we are hanging backwards, climbing obstacles, or other situations where we have the pack out of upright the leveraging force of an internal pack is much less than an externally framed pack.
The question that decides your pack selection is, what characterizes the trails on this particular trip? Is the trip predominantly on or off the trail? And, what are the temperatures?
Since losing my internal pack in a loan to a "friend," I've found my pack selection simple: my External framed pack for Winter Travel. And Summer travel. I use my External framed pack for the long trails as well as cross-country travel during Summer and Winter. I now use my External framed pack all the time, in all situations. Bummer.
Sometimes you have the optimal gear options at your fingertips (or on your shoulder blades), sometimes you don't. In the final analysis, you just gotta make your gear work. There is quite a difference between not having the optimal gear and not having sufficient gear.
For scrambling I bring a small backpack, the same one I bring for multi-day supported speed hikes.
Conclusion
As with all the skills explored on this page, we are looking for what works best for you. I have laid out my selection criterion that determines if I will use an External or Internal backpack on a particular backpacking trip.
Yours may be different. The important thing is that you find the gear you need for your application.
Member's Favorite Internal Framed Backpacks
The Pursuit of Lightness
Member's Favorite Ultralight Backpacks
The tarp-tent issue, as well as the selection of trail shoes and lightweight clothes has been deeply affected by the pursuit of lighter and lighter packs.
Lightness is an important factor for gear selection, but the pursuit of lightness should never compromise bringing the proper footwear, shelter, and clothing that the possible range of conditions in the Sierra Nevada demands.
I dwell on this because improper gearing is a constant theme among individuals who "suddenly" get the itch to hike the Pacific Crest Trail as their first real backpacking experience.
Just to set you straight, that's not very wise. Build some experience. Get to know how you and your gear work on the trail and in camp. Get to know how you and your gear work together when things get wet and cold, and do this before you are isolated somewhere along the Sierra Crest in an unexpected Summer snowstorm while completely exhausted from unaccustomed altitude.
Packing It In. All of it...
Before you can bring anything to a trail campsite, you have to fit it into or on your pack.
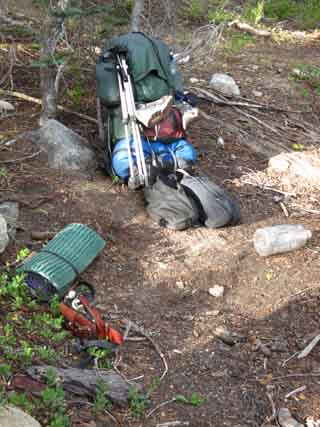
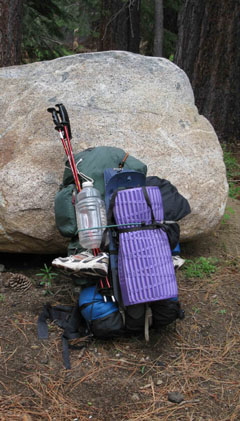
| Emergency after dark throw down campsite: a soft flat, but a quarter-mile distant from water. | Pack loaded and ready for a Spring Snow trip. | |||||
 |
 |
|||||
| Ready to lash on the 2 huge food bags, sleeping pad, water bottle, and hit the trail. | Note the snow shoes behind pad, behind the bungee cords attached to each other and the pack frame. |
Above Left: Packing up to depart a very primitive "throw-down" spot, taken after pushing all day, and hiking through twilight into darkness. The flat spot was as big as my sleeping pad, a boulder provided a seat back, and water was close enough. Also note the two food bags sitting before the pack. Inside the pack behind the red panel is a Garcia Canister.
These two food sacks are secured by a line from each sack over the top of the pack to a clip attached to the pack frame.
I can easily hold 22 pounds of food with this set-up, plus another 5 pounds in the Garcia Food Canister, making a total of 27 lbs for 11 days of food. The picture on the Above Right shows how this sling and lash system works with snowshoes and a full Spring Snow setup, including one external food bag. All external gear is held tight in position on my pack by the two bungee cords.
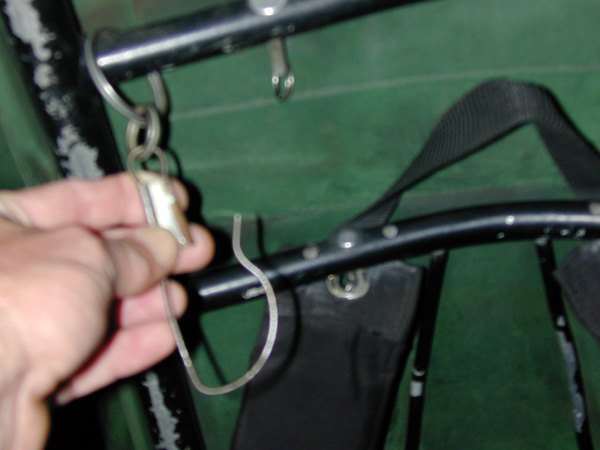
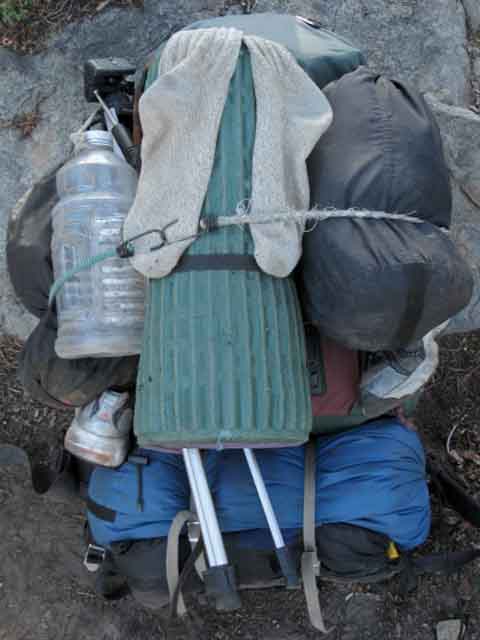
Above: I have my pack set up so that the heavy external food sacks pictured above, as well as a variety of Winter Gear, can be secured to the outside of the pack by lines leading over the top of the pack to the clip pictured above. This allows me to externally suspend heavy gear at the height I choose.
This rig will hold a ton of shit.
 |
| Pretty much fully loaded. We could still fit snowshoes, snow sticks, crampons and an ice axe on this rig. If we can carry it! |
The external load is held at my selected height and position tight against the pack by two bungee cords. The load is held securely up against the pack so that no "bounce" is generated during hiking.
I have fallen down many times with this sling and lash set up, and it has retained control of all my gear during all my wrecks. I once got wedged upside down, but that's a different story...and then there's the time I sank down to my neck in snow above Death Valley on the S side of Telescope Peak...and the pack held the gear every time.
I can secure an 11 day food supply weighing in at 27 pounds for long distance hiking with the sling and lash system. The light plastic water jug allows remote "showers," and reduces filtering to drinking water only.
Good Clothes
Member's Favorite Backpacking Clothes
Four Season High Sierra Gearlist
The sayings are endless: "You see all four seasons in one Sierra day, and find out about two other seasons you never knew existed," and "fry during the day, freeze during the night," are two that I enjoy.
Cold temps happen all year round at high altitude. It is vitally important that you have sufficient insulation layers to keep you warm during single digit evenings. It happens. You will see mid-twenties at high altitude all Summer long.
My standard Summer bag was a 2 lb 20 degree down sleeping bag, the green bag pictured on this page. The grommets on the mummy head pulled out, so I regretfully traded it back to REI. It was one of their special manufacture sales, and I will not see one like it again for a while.
Now I'm using a real light Mountain Hardware 40 degree bag. I had to fatten up my insulating layers when I traded the 20 degree bag for the 40 degree bag.
Here's how I figure my lightest Summer gear kit, and every other season's too, but with a different standard:
What temp can I deal with wearing all my clothes, zipped up in my tent, zipped up in my sleeping bag? That's different from the clothes you need to stay up until Ten PM.
Check the GEAR section for the four season High Sierra Backpacking Gear List.
Cold Temps in Early August
Above: Rush Creek with iced surface, South of Donohue Pass late on the morning of August 8, 2009.
"Life eats itself to survive: today you are the main course" well describes the improperly prepared hiker during the height of the mosquito season.
Check out the Mosquito Article on the Backpacker's Forum, as well as the mosquito notes above.
I employ an ultralight outer shell once the threat of Winter Cold diminishes during early Spring, to when the threat of Winter Cold rises in Fall.
This ultralight shell defends against wind and water, but has absolutely no insulating power. This makes it vitally important you have the clothing layers under your shell required to keep you warm in the wide range of temperatures that can characterize a Sierra day.
Food
A wide and abundant selection of different types of foods is mandatory in my pack. My basic approach is that I figure on my food having an average of 100 calories per ounce, which measures out one pound of food at 1600 calories, putting my daily 3200 calorie diet at 2 lbs of weight. By the time I get everything into my food sacks I am averaging a Kilo a day.
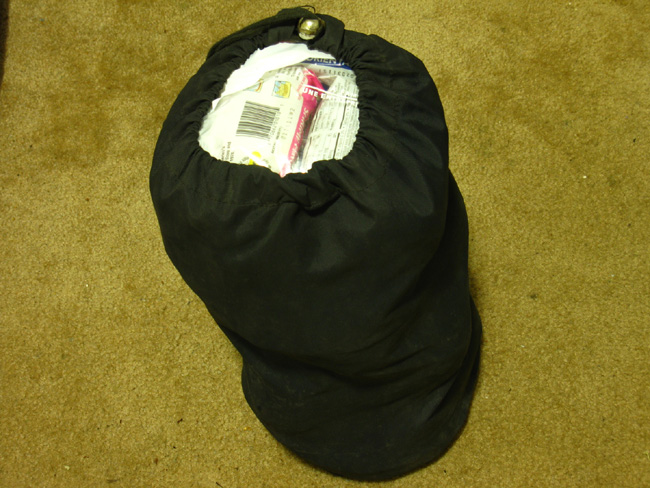
Above: Five day waterproof food supply sacked up and ready to go.
I have a set of articles and videos about setting up a five day food supply you may find informative. Though this was set up for a Winter snow backpacking trip, it is as equally informative for Summer travelers.
The National Parks and some National Forests and Wilderness have mandatory bear canister policies. That's good, and I fully support and strongly suggest using bear canisters rather than use food hangs. I always carry a bear canister, except during Winter.
The problem is that my Garcia bear canister will only hold five days of food, and that is packing it in with a shoe horn. Another issue is that the Garcia weighs three pounds. As I pack for up to eleven days of backpacking travel, that leaves another six days of food outside of my canister.
As the pack is approaching seventy-five pounds of weight with eleven days of food, I sure as hell am not carrying more than one bear canister. So I'm going to be doing food hangs until my food supply fits into the Garcia.
Varmints and Bears are not the problem. It's the people. People have educated many bears that they can successfully seek out food from Humans. Bears have observed the opportunities and worked out a systematic and well thought-out series of approaches to obtaining food from backpackers in camp or out of tree storage.
Sign Translation: This is Bear Territory
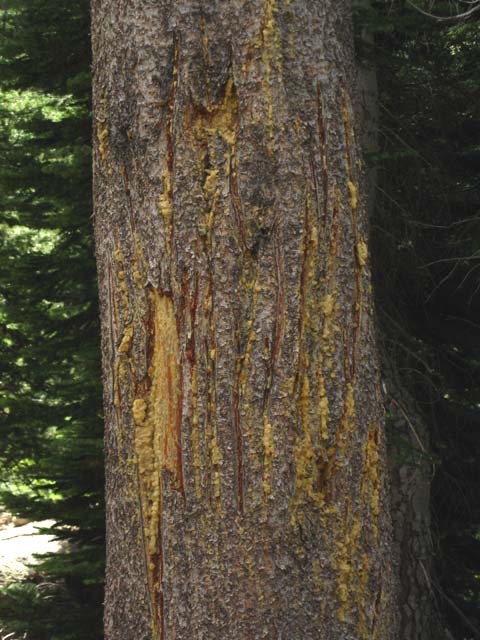
Bear Territory: Bears love to decorate trees. Claw sharpening, territorial marking, message board, or just plain restless. East Carson River. Always note the recency of the wounds and sap...
Bears have "technology," meaning a practical step-by-step approach to gathering food from Human Food Hangs. Mother bears pass this wisdom along to their offspring by example. That implies that bears have culture, and pass these cultural behaviors down through their generations. Yup.
Below is a description of various strategies that Bears have employed to attempt to steal my food. So far only one of many attempts was successful.
Some bears employ a few of these techniques, and I have observed a few of the older and wiser bears employ them all, and in exactly the sequence described below.
Bear will first locate you or your camp. If the old bear locates you on the trail, it may follow you to camp. I have only seen this behavior once, and with a relocated Yosemite Valley Bear in the back country. Wild bears run away from you, and only employ "hit and runs," as a wild bear is frightened of humans by definition.
Bears that approach without fear are acclimated bears.
Bear will first lay low and observe your camp by using its nose to scout your camp and locate you and your food stash.
If the stash is sitting out on the deck the bear will try to take this as an easy score that can be taken on the run: Bear will run through camp and snatch your food sack on his way through. Thus it is always good practice to make stashing your food the first step of establishing a campsite. If the bear observing you cannot do a run-through, bear moves to the next step. Time to meet your neighbor, Mr. Bear.
Bear will locate which tree, and exactly which branch your food is hanging from by nose. Bear will approach the position exactly under the hanging food while cocking its head back and forth. Bear is cocking head in an attempt to help its bad eyes locate the tie-down line. This is when you begin the application of rocks along with some verbal discouragements.
If you are dealing with a wild bear, bear will immediately retreat. If the bear is partially acclimated to humans, it will retreat a short distance, and start eyeing you while bobbing up and down. This is classic "I'm nervous" behavior for bears, but a degree of acclimation to humans combined with the desire for your food will hold these bears in place, but they will be bobbing up and down, or pacing back and forth. This means it is time for you to drive the bear off, and turn bear's nervousness in the presence of humans into downright fear: drive the nervous bear off.
If the bear is acclimated to humans, your rocks, threats, and curses will have little effect on a large bear: He will continue to stand under your food sack, probe your food hang for weakness, as you continue to bounce rocks off his head, and tell him to get the F out of your camp. Keep your distance from acclimated bears, but keep bouncing the rocks off his head.
If the human-acclimated bear is unable to locate the tie-down line for your hanging food while approaching the hanging position, bear will stand up under the hanging food and attempt to break the unseen line by swatting around at the logical location the tie-down line should be angled-off from the hanging food. I have seen them do this too many times not to believe they are looking for the tie-down line. Bear will also check the height of the food sack while standing under it, to see if it is within bear's standing reach.
A bear acclimated to humans will do this while you are bouncing big rocks off its head. Bears consider the rocks about as much discouragement as they do a mosquito or a bee: little or none.
If unsuccessful at locating a tie-down line, bear will drop back down on all fours to climb the tree.
Watching a large Black Bear quickly climb a tree is impressive, and horrific for the tree. Very Large bears can literally do a "burn-off" while climbing rapidly up a tree. Very Large bears can also run across the terrain very, very quickly. I've seen huge bears turn towards a tree and hit a high speed in two steps, then maintain that speed up the tree.
Very Large bears are also excellent rock climbers, and they deal with water like olympic swimmers, with both grace and power. I once watched a medium-sized bear climb the rock face behind Emigrant Lake in the Emigrant Wilderness as easy as I walk across a meadow.
This level of power and skill in negotiating the elements of its terrain means that a highly-motivated Very Large bear climbing a tree can literally tear the bark right off the tree while shredding the tree trunk: The bear is powerful enough that during a rapid climb the bear's claws do not dig in, but actually slash through the tree's bark and trunk (doing a burn-off!) as it rockets upwards towards the branch holding our food hang. Frk'n Yikes! The sound is like a wood chipper without the motor.
I can't run on flat land as fast as a motivated bear can climb up the tree holding my food.
Bear will climb above the branch holding our food hang, to better position his weight above our branch. From this position bear can use and direct his full weight downward onto our branch in an attempt to snap it off, while holding itself steady with upper branches. If the branch holding our food hang is too flexible or too strong to break off, bear will change his approach.
Bear will now stop trying to break the branch off, and begins trying to "bounce" the branch so that the food line will bounce off the end of the branch. Bouncing the line off the end of the branch is a threat to both counter-balanced and tied-down food hangs, and both can be vulnerable to this type of approach..
To prevent the counterbalanced food bags from bouncing off the end of the branch you must position the line behind a strong "T" in the branch. To prevent a tied-off food hang from walking off the end of the branch you can position the line behind a T in the branch, and make sure that the tie off line runs away from the end of the branch.
Your Position in all this
If you know what techniques the bears use to get food hung in a tree, you can hang the food in such a way that the bear can never get your food. This is unlikely. The problem with hanging food from trees is that you must have a tree that is adequate for a bear-proof food hang. Finding such a tree is a serious problem for many miles and at many key camping locations along all the trails from Lake Tahoe to Mount Whitney.
For very long lengths along the trail the trees are inadequate for food hang protection. Even rookie bears can easily steal food hung from trees insufficient for the task.
You must decide what you are going to do, and what kind of bear protection policies you are going to exercise in terms of food storage and your bear response on the trail. You have a range of food storage options: Bring no canister and tree hang? Bring one canister for all 5 day and below trips, and hang any extra food? Bring one canister per 5 days of travel? It is up to you. The same goes for bear in camp policies.
Will you resist uninvited bear visits to your camp with rocks and harsh words? Or will you retreat and let bear have your camp? Again, your response depends on your level of experience, which is going to determine how you evaluate the situation, and what you feel comfortable with. The same question applies if bear obtains your food. Will you chase him down, and force him to relocate his dining spot a few times in the hopes he will drop some of your food? Or will you give it up?
You should set your policies before you hit the trail head, and modify them as circumstances and your experiences develop. It is much better to have an idea about what you are going to do in any specific situation before it happens.
In any case it is your responsibility to find and pack out the ripped up food bags, the shredded zip locks and bulk food wrappers that the food-stealing bear will leave in a pile at his dining spot. This is your mess, and even if you did not get to enjoy making it you still have to clean it up.
Very Important Bear Note
Variations of bear Culture are unique
We take serious note of the fact that black bear behavior is very specific to geographical regions. Black bears have different behavior patterns, different cultures, that express themselves differently in different places. Some of these cultures are very aggressive, up to and including man-eating. All the behaviors related here on this page and these websites describe High Sierra black bear behavior between Lake Tahoe and Mount Whitney.
Who Knows?
High Sierra black bear behavior may or may not fit within, or even defy any behavior I describe here. Not only are bears wild animals, which means that, "who the hell knows what they will do under stress," but also includes the fact that bears also learn and change. All the web of life is currently under incredible stress. Animals all around the world have been expressing unusually aggressive behavior. (2015)
None of my observations of, and experiences with High Sierra black bears counts a lick towards predicting furture changes in bear behavior in the Sierras, what you might experience, and especially black bear behavior in other wilderness areas outside the Sierra Nevada.
It's a Wild World out There.
When I was in Alaska the black bears were eating folks, and the Brown Bears were fairly chill. This was much different behavior than that of High Sierra Black Bears, and brown and black bears in North America. The Grizzleys in Montana, Colorado, and Idaho have always eaten a few hunters every now and again, but during the last few years they have become more aggressive, along with coyotes.
I was camping on the deck of the Inland Ferry from Bellingham Washington to Haines Alaska. What a trip. I was watching Killer Whales hunt and eat. I can't tell you what they were ripping apart, but they were ripping all sorts of large fish and mammals apart.
In one port I I read newspaper articles about a series of missing backpackers, at the next port I read that one of them had been found when the local cops shot a suspect black bear and cut the backpacker's remains out its stomach. No bullshit. The black bears were attacking.
That does not happen in the Sierra!
Locals were offering to loan me heavy sidearms for the duration of my trip. "Here, take this, and just bring it back when you come back down." Jeeze, what good folks there were in the Alaskan small towns. My Aunt and Uncle met on Kodiak Island, and lived in Alaska for a long time. They were both smart and had excellent common sense. My Uncle traveled with an Eddie Bower survival suit in his trunk...
Nice folks up there, in the country.
None of the Alaska locals went into the backcountry without sufficient weapons. "Sufficient" to take down a very large black bear, and even larger Brown. I demurred, and reached for strategy. I was using my "cook and eat in one spot, then hike to camp and sleep in another, far distant spot" strategy, The old "make them think I'm over here, then move over there" strategy. Oh, and I was still real worried about both the brown and the black bears!
I was putting up the tent liner for mosquito protection, (Oh, the mosquitoes of Alaska!) and freaking out every time I heard a branch cracking during the cold nights, even though I knew that all the bears up there went to sleep at night. No human acclimated bears that prowl at night up in the wilds of Alaska. That's reserved for the Sierra and Rockies, and even the Olympica. And anywhere humans have trained the bears to do bad tricks.
But the bears in Alaska are natural classics.
I was thinking about designing and producing a "backpacker's friend," a cold-rolled cylinder four inches long bored at .44 with a quick-remove chamber-cap/firing assembly, wrapped with leather and fired by retracting a hand-spring firing pin in the cap. This would be the basic one-shot "final shot" instrument for backcountry backpacking in Alaska.
I could carry a lightweight "last option" bear killer, if an aggressive bear closed the final distance turning its fake charge into a bear attack. At that point I could get off a final shot at continuting the trip.
The reasons behind the "backpacker's friend" idea is that weapons are really, really heavy, and have no intrinsic value along the vast majority of trips through bear country. We will not be attacked.
But when we are in serious bear country (not the Sierra) and things go real bad, we want a sufficient caliber and accuracy of weapon to blow the fucking bear's head off when it steps in. We want it reloadable, to carry the sufficient ammo, say two or three rounds, to provide coverage over the length of our trip.
I have great respect but little fear of High Sierra Bears. No weapon necessary. The same is true of Alaskan black bears, but weaponary is necessary. It's just that I don't like to carry heavy guns. Thus my "backpacker's friend."
My point with all this is that we must consult experienced local authorities to gain specific information about every unfamiliar backpacking area we enter. This includes the Ranger District of the Forest or Park we are entering. The thoughts of a couple of experienced local backpacers fills in the Ranger infomation.
We need to ascertain the specifics of local animal behavior, local poisonious plants, and water availability and conditions, just to get started.
I can tell you that weapons are completely unnecessary and illegal across much of the High Sierra Crest from Lake Tahoe to Mount Whitney. I really don't care if you carry a gun, just as long as your petty fears do not cost any critters their lives. They will come for our food. Deal with it. Be properly prepped and ready, and that's good enough.
I am not criticizing folks who hunt for food. Life eats itself to survive. Good for you. Happy Hunting. But killing things pursuing "sport" or out of fear is unmanly.
Bear Proofing our Food
FOOD HANGING
Counterbalanced Vs. Tied-Off Food Hangs
The branches in the pictures below are too flexible for the bear to snap off. The bear cannot bounce the food bags off the end of the branch because I have the parachute cord looped behind two perpendicular branches forming a "T" off of the main branch.
This is a good food hang branch for either a counterbalance or tied-off food hang.
This type of set-up will hold the food sack line on the main branch despite all the shaking and bouncing a bear can throw at this unbreakable branch. An extra benefit of the "counterweight" style hang in the second picture below is that there is no tie-down for the bear to find.
Tied-Off Food Hangs
But don't worry too much about tied-off food hangs, if you set them up correctly: bears can't see shit. The first image below is a big, flexible lodgepole pine, if I remember correctly. I ran a tied-off food hang off this tree.
The second tree pictured below is a big, very flexible whitebark pine.
The flexibility of High Sierra trees is dependent on where they sit in relation to the snowpack. Trees that are not very flexible live above the snowline at their own risk.
Whitebarks and lodgepoles are very flexible, and live far above the snowline. But most are small and don't have great overhanging branches suitable for hanging food.
Hummm.
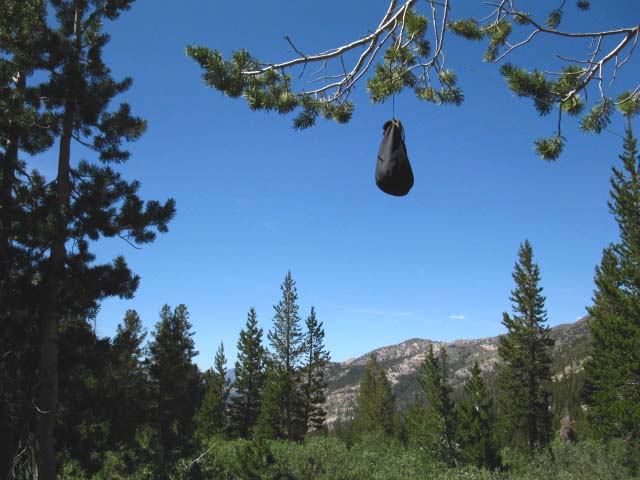
Tied off food hang at "Boy Scout Camp" along the unmaintained segment of the Tahoe to Yosemite Trail along Summit City Creek.
Let's Play
"Find the Tie-down"
Bears smell and hear real good, but they have a hell of a time seeing a tie down line if you hid it well, and especially if we are bouncing rocks off their head as they search for it.
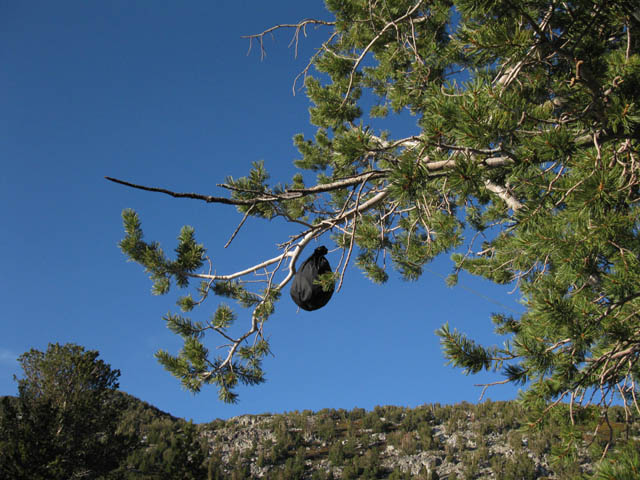
Hunter's Camp story
Above Hunters Camp there is a big boulder that provides an expansive view, where we can see all the way to Ebbetts Pass. I had ate dinner and made hot chocolate and retired to the boulder to watch the view change with the setting sun and have a relaxing smoke.
Hunters Camp has exceptional sunsets.
I noticed something moving fast across the meadow way off to my right, the East. A blur in my peripheral vision. I shifted my attention from the Sunset to the more-quickly moving target. It was a young adult bear, real ratty and skinny looking, about 200 yards out, running as fast as it could straight towards my camp. It was wandering past searching for food and smelled the Mother Load in my camp. I was less that 30 yards from the campsite. In the campsite I had pulled my food bag up just enough to prevent coyotes, rodents, or varmints from snatching it. The food bag was hanging almost exactly at the height of the damn bear's mouth.
"Shit," I thought as a jumped to my feet.
It was a raid, and I was set up as the victim.
I was sure that the bear would beat me to camp, as I only had about a 170 yard head start, I thought as I charged downhill towards my campsite. I figured I would arrive in camp just in time to see the bear not even break stride as he snatched my food bag that I had so perfectly hung for bear to snatch.
Luckily, I arrived in camp just about 2 or three seconds before the bear ran around the tree. Just enough time to think, "ah shit, I beat a bear here," when the bear galloped around the tree about 8 feet from me. Bears gallop, running in a manner somewhat between the gallop-gait of a dog and a horse. Bear almost shit himself, he was so surprised to see me standing next to my food bag, that he almost went ass-over-teakettle trying to put on the brakes to stop while simultaneously trying to turn around and do a burn-off attempting to escape.
The bear started "crossing-up," sliding first one way, then the other.
I was looking as tough as I could, barking harsh curses at the already totally freaked out bear.
They hunt bears around there, and that bear thought he was frkn dead. I immediately felt bad, seeing his over-the-top fear. Bear had already gotten by the "scruffy" stage to young adulthood, but Bear was looking pretty beat-up. Bear was obviously not yet a fully established bear in this area. Thus the ratty look, and my feeling badly for making the bear spend a thousand calories that it could not afford to lose, nor would his expenditure be rewarded with food.
Bulletproof Bear Tree
The branches used for the counterbalanced and tied-off food hangs pictured above cannot be broken off, and the line cannot be walked off the end of the branch by bouncing. We've re-directed and camoflauged the tie-off line using the brushy nature of the White Bark Pine, in the example above. The tie-off line is secured to a solid branch the bear will never find.
I would run the tie down line for the set up below, if I had decided to tie-it-off rather than counterweight it, to a different tree further away, but located behind the hang tree, if possible. This way the direction of the tie-off line helps prevent the bear from bouncing the food bags off the end of the branch. I run the tie-down line to the distant tree at a height the bear would never find, or run into it.
We don't have to tie our line to the tree we hang it from.
Tie-down lines can be hidden and camouflaged in numerous ways. Running the tie-down line from the food sacks in a straight line to the trunk of the same tree your food is hanging in is a bad idea. The smart bears have that one down, and check the obvious angles the tie down line would cross to the trunk of the tree under our food sacks. Bears are by no means non-reflective.
Bear's perception and analysis reflects different needs, perspectives, and realities than most humans can pick up, but we have managed to get their "attention." That attention is significant, in a "bear" sort of way.
To bring the counterweighted food bags down you can see that I've attached a line that hangs down from the left food sack. I can snag this line with a stick to pull that food sack down within reach, or I can use my stick to push-up one sack high enough to lower the other sufficiently so I can detach it from the counterbalance.
Heavy Counterbalanced Tree Hang
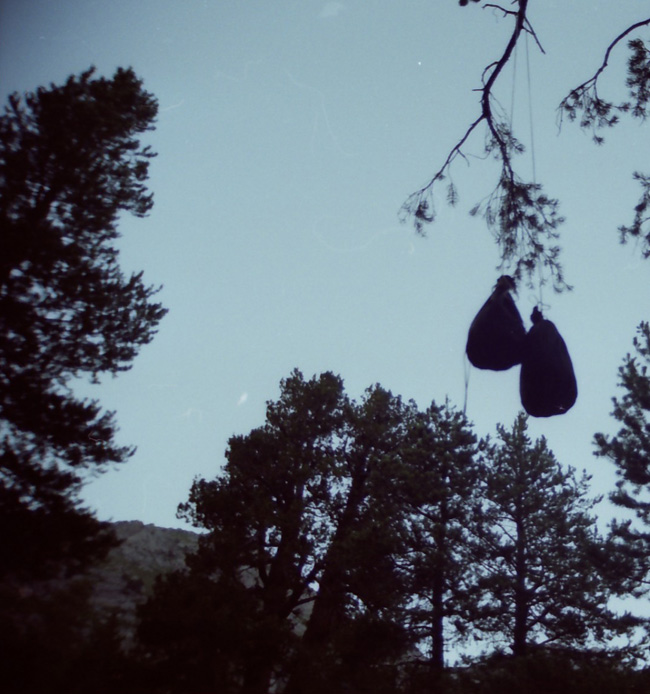
Above: Old School food hang at "Boy Scout Camp," circa 1999...Notice the line is behind the "T."
Because of the sophisticated technology of bears, and the lack of adequate trees for perfect tree hangs, I totally approve of, and strongly suggest hiking with a food canister during Summertime even in areas where it is not required. But don't put all your eggs in one basket!
My Garcia canister holds five full days of the 11 day food supply I am capable of carrying. I hang the other 6 days of food hanging from from my backpack on the trail, and from a tree in camp.
The Garcia Bear Proof Canister
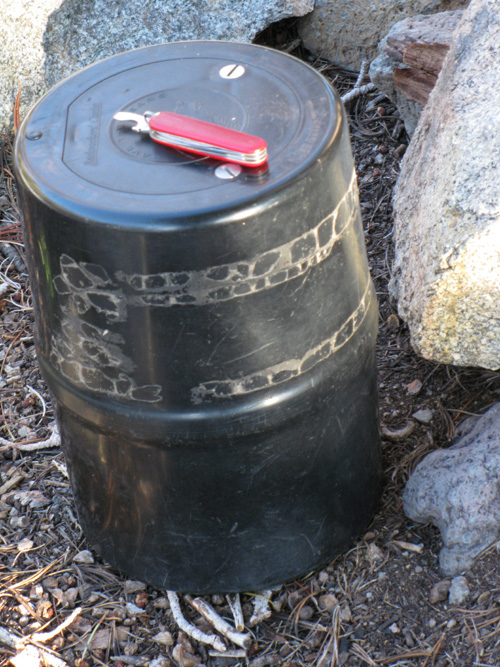
Above: Garcia Food Canister. The tape attached an old mailing label that was subsequently removed by a bear at Benson Lake in the Yosemite Backcountry...
Food Hanging Strategy
I hang the "lightest" calorie food in the tree when I am splitting 11 days of food between the bear canister and the food hang. I put some of the trash, the smelliest food, along with the most calorie packed foods in the canister. I stash the bear canister near the food hanging from the tree.
I put my aluminum cooking pot with a couple of rock in it on top of the food canister.
This should draw the bear to the canister before the tree hang.
I do this so the bear will swat the food canister around for a bit before going for the food stashed in the tree hang. This noise wakes me up, which allows me to deploy the stack of rocks I piled up before I slept, and use them to quickly drive off the offending bear. Or not.
If the bear is just swatting the food canister around, I generally enjoy the show for a while. Bear Soccer. It really frustrates the bear swatting around your food canister when you laugh at them. They start swatting it harder. Then I get tired and go back to the sack and the bear wonders why it ever changed its sleep pattern to suffer such frustration.
Frustrating encounters between bears and bear canisters will eventually train bears to ignore backpackers altogether.
To enjoy watching a bear swat your bear canister around, you must stash your bear canister in a location where bear can not swat it off a cliff or into a river. I would like to see the look on your face when a bear swats your food cannister into a river, and it starts floating downstream...
Every year I encounter individuals on the long and short trail who practice Voodoo Bear Protection practices. By "Voodoo," I mean food stashing techniques that have no basis in science or practice. Among the stupid things people do on the trail in the mistaken belief that it will repel bears are:
1>Peeing. I swear to god that I have met many people over the years who pee around their food in the hope and/or belief that the smell of human urine will repel bears. Despite being unsanitary, urine does not forestall bears.
2>Leaving their food supply in their backpack, or hanging their backpack with the food in it. One question: Why the hell are you training bears to relate food to backpacks, essentially training bears to snatch backpacks? That is just plain stupid, so stop that practice right now. You are just training bears to steal backpacks, like the idiots on the East Coast have already done. Once bears learn that backpacks hold food, they will steal backpacks that do not contain food out of habit.
I blame the development of backpack-snatching bears on Forest Managers who came up with the idea of setting up cables at campsites that are designed to hang backpacks as bear protection. This is the stupidest idea I have heard for quite some time. Only food sacks should be hung up, so that bears are not trained that the most basic piece of backpacking gear, your backpack, is viewed as a source of food by bears. Jeeze, that is just stupid.
3>Sleeping with your food in the tent. Hungry bear will pop out a claw, cut open your tent, and go straight through both you and your tent wall to obtain food, moisturizer, chap stick, toothpaste, or whatever edibles you left in your tent.
Bear does not care if you are using your food bag as a pillow. Remember, bear does not have an opposable thumb, and is going to grab your food sack with his mouth. Any body parts that are in the way are at risk.
This could be bad for your head, and any other of your parts that lay between the food and bear's mouth. I recollect hearing about many hikers serious injured over the years by bears entering their tents for food.
4>Hiding your food. I've seen backpackers "hide" food under rocks, or try to stash their food within rock formations. The problem is that you cannot hide your food from the bear's nose. The bear's nose will find the food. You can use rock channels to stash your food as long as the channel is deep enough to be beyond the bear's reach, and solid enough that the bear cannot pull the rocks apart.
If you do stash your food in a rock channel you will have to find and fashion a branch to hook a loop on your food bag to pull it out. Finding a branch sufficient to hook your food bags at high elevations where the rock channels predominate may be difficult. If you can remove the food bag with your own arm the bear will be able to pull it out too.
We will have the same problem finding rock channels as with finding hanging trees: finding adequate rock formations for safe food storage is as difficult as finding a good food hanging tree.
5>Trying to take food back from a bear that has already snatched your food. This is a real bad idea. A lot of bears will take your food, lay down right in front of you, and make you watch them eating your food. This is a sad, sad experience, let me tell you.
If you try to walk up to the bear to take your food back, the bear will swat you like a fly. Humm...
Understand that the practices described above are variations of having no bear protection for you food whatsoever. You are depending on chance. If there is a bear in the area it will find and take your food. If there is no bear in the area you will be fine.
The following information has been garnered through decades of personal experience. I do not suggest that you try to get your food back. That is up to you, and is a choice that should be carefully considered based on your own experience, not mine.
All of the bear experiences and behavior noted here are of High Sierra Black Bears. These behaviors do not apply to Black Bears in any other region. Black Bear behavior differs significantly in different parts of the country.
Once the bear has your food, your best bet is to have some big rocks handy, and bounce them off his head. It's my practice to pre-establish a suitable pile of bear rocks within easy reach every time I make camp.
These rocks are to defend your camp as well as recover food.
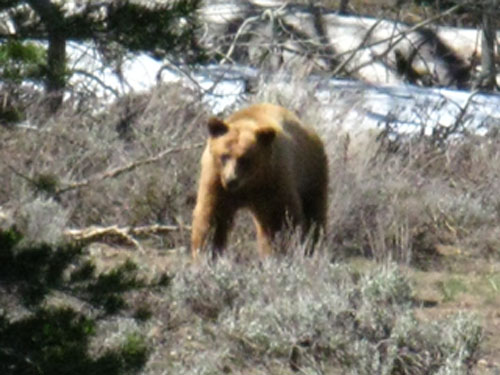
Above: Bear at Poison Flat, Spring 2010.
Don't rock the cubs-I strongly suggest retreating once you see a mom has cubs and your food. Moms with food and cubs are very cranky-you already lost the food battle-so take it like a man. No rocks, no chasing them, no nothing.
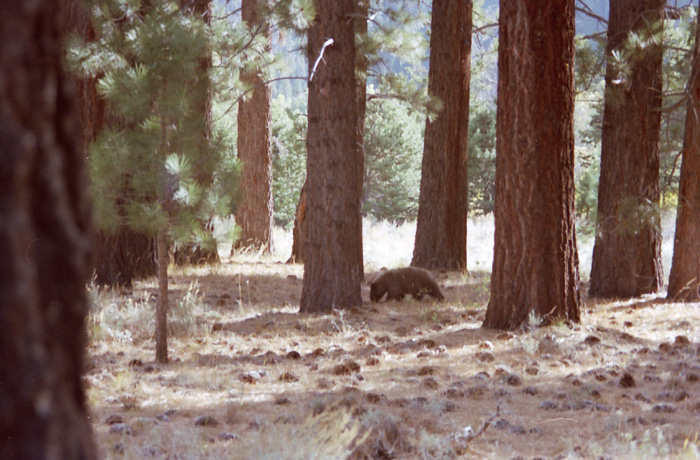
Above: Watching a "scruffy" bear rooting around on the perimeter of Carson Meadow during the Fall of 2002. Scruffy was sooo hungry he did not notice me at all. I did not want him to, as running away would cost this poor guy more calories than he could afford to spend. Good Luck, little scruffy!
Don't rock the cubs or skruffies. They are not tough like fully developed bears. Fully developed bears are built like bomb-proof bunkers. Skruffies are not. Skruffies are between being a mother-protected cub, and not quite an established bear. Thus they look "scruffy," and are having a hard time getting along. All the mature bears pick on them.
I will continue to defend my food against a mother with a cub if they are really going for it, but I will only rock the mom, and never get between the mom and the cub. I figure it like this: Mom is teaching the cub to take human food, I am showing the cub, by bouncing rocks off mom's head, that humans should not be messed with.
Always train bears to fear people, but never hurt them.
How it Comes Down
But, if a single bear has your food, bear is going to run off a short distance to settle down to tear open your food bags and eat it. I approach (run up panting and yelling...), stop about 15 to 20 yards out, and start jumping around, hopping mad, tossing rocks. A few well-placed rocks to bear's head will get him back up and running.
Hopefully he left one of your food sacks behind, or a couple of freeze dried dinners fell out of the ripped up food sack.
If not, chase the bastard down again. You will eventually catch up when he lays down to eat your food, and reapply some rocks to his head, and get him up running again. Repeat as necessary. Hopefully he will drop your food during one of these exercises.
Defense works about the same. I encountered the group of Firefighters from Riverside pictured below at Fish Creek a few years back. They were the firemen that made the brave stand that saved Reds Meadow Pack Station from burning down during the big fire of 1992. Reds sets them up with horses and mules every year since, and the boys head out to do Reds allotment of trail work.
That'a an amazing balance of risk and reward, worked for on both sides of the equation.
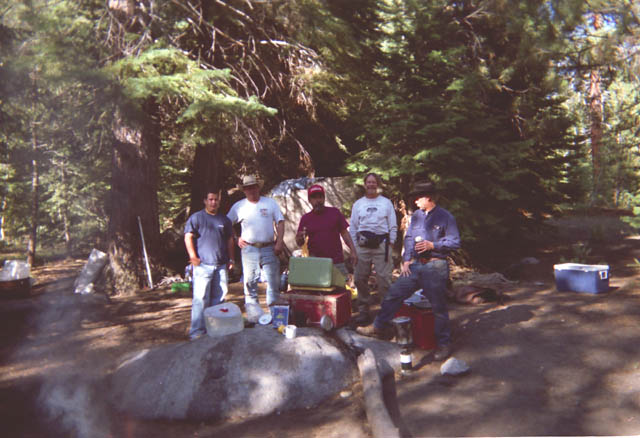
Al hanging out with the Riverside firemen-cowboys in Fish Creek South of Reds Meadow.
We got along famously. I walked into the middle of the camp, looked around at them, and said, "what the hell are you guys doing in my camp?" They all laughed, said, "cooking you dinner," and handed me a cold beer. They told me of a cinnamon bear that was probing their camp. They were packing heat, but I assured them that guns were not necessary with black bears in the Sierra.
They were packing pistols with a couple of buckshot loads before the lead. This would allow them to fire off a couple of buckshot rounds before the deadly lead. Nice, and thoughtful guys. No need to kill a critter unless you have to eat or defend yourself.
But I repeat, guns are unnecessary for dealing with the bears in the Sierra Nevada.
Shortly after arriving at the camp pictured above the beautiful adolescent cinnamon colored bear arrived. It was nervously adjusting to humans. I had already piled up a suitable collection of rocks anticipating his arrival.
I took many pictures, but they all disappeared off the roll at the developer's. The pictures of the horses and cowboys all appeared, but my custom bear shots vanished. It was Magic. If any of the Riverside Firemen who were there see this, send me your stories and shots!
When the bear arrived I followed his movement around the perimeter of the camp, blocking access. He began "bobbing and pacing," torn between retreating from anxiety, but held by the smell of bacon. Hey, the Firemen were living big! They were burying their bacon grease, drawing the bear.
When I noted the bear's conflict I immediately charged with a banshee yell, stopping for a second to launch a rock that caught him square between the eyes, whereupon the bear turned and made a new path through the undergrowth running in fear with me screaming in faux pursuit. The cowboys jaws dropped in unison. The bear did not return during the rest of our stay.
The next morning the dudes had a lot of work to do to pack up their massive camp, collect up their mounts and mules, place their camp on the mules, and their asses on the mounts. I could have split quick and hit the trail when it was still cool out, for I had the massive climb up to Goodale Pass before me. Goodale Pass sits between Fish Valley's detour to Iva Bell Hot Springs on our way to Vermilion Valley Resort, our next resupply spot, and where we will rejoin the John Muir Trail after our side trip off it to visit the spectacular Iva Bell Hot Springs.
Oh, that's the point of all this; I was hiking th side route off the JMT to hike to Vermilion by foot, via Iva Bell. The further off the beaten track we hike, the more likely we are to meet "natural" bears. The closer we stay to popular backpacking and camping spots makes it more likely we will encounter acclimated bears.
I prefer the wild over the acclimated bears. The acclimated bears are hard work to deter, whiile the wild bears are easy.
The The "Living Things Policy" is that we will not cause living things to use more energy than they would have used, had we not been there. On the other hand, it is to enhance the experience of the living things we encounter. Well, at least that's the goal. That means we must observe them first. The logic behind this policy is that living things spend most of their time looking for food. Living things are often hungry, calorie short, even starving at times. Therefore we try to avoid causing them to use extra energy. We do that when we stumble into a situation where we surprise them and us, and both parties are in "reactive," rather than controlled situations. I would much rather observe the wildlife before it observes me, or I stumble upon it, so I can enjoy quiet observtions before engaging the situation. Living things are also deeply engaged, observing and responding to the environment, so we can get some good mutual observations going, if everyone does not freak out at the first encounter. There are both practical and pragmatic exceptions to this rule.
Practical Exceptions One practical consideration is trail time. Living things blocking our access to trails, water and campsites are generally given a long bit of "observation" time before moving them along. Personally, I have "bombed" those huge elk that live up at Lost Coast. I have no trouble walking around them in the slivers of meadow, which is where we are most likely to encounter them, and where there is some room between backpacker and buck Man, that tries my patience. I was hiking through one January when there was a very powerful storm rainstorm coming off the North Pacific, and a bunch of big bucks were on the trail where the traii, at a point where the trail was not much wider than my shoulders. I first tried to "shoo" them off the trail, which they refused to even acknowledge. So I retreated and waited for an extended period of time in a driving North Pacific Storm before I finally "rocked" them off the trail. Another time at the Silver King Creek in the Carson Iceberg Wilderness I watched a bathing-fishing-fucking-around bear, in pool at the ford, for a long time before making me known. I stood up and vocalized a bit and waved my arms. Bear was not impressed. Bear looked up at me, said "screw you," and kept screwing around in the Silver King Creek. I had to make a banshee yell and start trotting down the final length of trail to the Silver King to get that sucker moving! My point is that most times we don't want to scare them, then at other times we cannot even get them off the trail to let us pass! Our job is to understand the situation and act accordingly, be it charge or retreat. It is our superior reflective capacity that gives us this responsibility. The Eye of the Storm I speak mainly to solo hikers. Groups make enough noise to warn everything living and dead of their approach. Solo hikers can move quietly and swiftly through the terrain. We can scare things if we don't let them know we are there. Once we let them know, they typically know we are not hunting them. Our observation and communication powers in Nature are fundamental to a very sophisticated "handshake" that should only be used for good outcomes. We have The Power. Calming Animals It's informative. Making animals aware of our presence in a non-threatening way diminishes the chance they will run headlong through a thicket in a desperate attempt to get away from us. We can inform them as they inform each other. But they might freak out anyway, depending on their previous experiences. On the other hand I don't give away my position until I've made all necessary observations, which means I've seen them first. Then we all know what's up, when I reveal my position. Then we can make the proper clicking sounds to let them know we are present. Interestingly enough, clicking may pause an already fleeing animal, to further study us. The point of our "living things policy" is that we don't like to startle or freak out animals along the trail. For example, when we see a line up of birds feeding along the side of the trail across a meadow in the morning (they use the trail to get access to the bugs on the grass stalks exposed along the trail), or sitting in trees along the trail, we can change the nature of our encounter with them by announcing our approach with a few well selected clicks. I am constantly amazed at how interactive and responsive living things are. They understand all the physical elements of our presence, such as where we are, what direction we are travelling, our speed, and even our "misdirection" options, but what always amazes me is how many of the animals can sense our motivation. Most of the Animal Kingdom can tell the differences between actions motivated by aggressive, passive, or frightened emotional states. It's fairly remarkable.
Practical Exceptions Practical Hey, I have fallen down on the trail to avoid stepping on a damn bug! In other words, we can run bugs hard. I will not run or chase anything else, except bugs. Not for torture or to create pain, but to take their pictures! And they never stop! The damn bugs run me ragged, which I will never do to any living thing. Unless I need to. Pragmatic Exceptions The mosquito and golden biting horsefly exception They are shooting to bite me below my armpit and back, or on the back of my neck, all points where I have the least defense, while I am trying to kill them. Mosquitoes die by the dozen. The Golden Exception relieves us from the general strictures of the Living Things Policy, that we don't strain or kill living things. We can run it hard If it bites us (actually bites us, or trys to bite us) or steals our food. Thus I run bears hard, attempting to train the ones who seek out humans away from human contact. WHY This may sound easy, but the requirments of navigating complex trail surfaces while performing the physical work of hiking the trail can shift our focus of attention while hiking from maintaining practices to simply maintaining pace. The trail can be a Brutal Mistress. Life can brutally simplify itself into just keeping the machine running, struggling down the trail. Maintaining Quality Exoerience requires Maintaining Oursleves If we are struggling internally we will not be able to engage externally. Our powers of observation and reflection, let alone interaction with nature are diminished in ratio with our physical inabilities. The high degree of difficulty of hese trails requires that we not only have enough energy to be able to perform the hard work necessary to hike them, but have enough energy to rise above far enough above the physical demands to control our effects upon our surrounding terrain. PCT DRONES Life can be as beautiful as dancing down complex trails at top speed observing the surrounding complex webs of life as we fly by. Or it can be as tedious as a PCT hiker who has hiked for a thousand miles without seeing anything but their own feet. I've come upon hundreds of PCT hikers over the last two decades who barely have enough energy to look over the tops of their own boots. They are in "survival mode," and not in engagement with the terrain they are hiking through, for the pain within themselves. That's not why I'm out here. Both of these conditions (pain and pleasure, vision and blindness) will characterize various sections of our experiences hiking down t he long trail. Given enough trail time we will hike through both, to finally find that our true destination is to both refect upon and meet the ever changing internal personal and physical challenges our journey through nature throws at us, but most importantly is for us to throw back at nature our consious reflection of its power and beauty as we hike through. First, we've got to have the energy to rise above the physical challenges necessary to see it. Second, we've got to display the sensitivity not to freak out, or freak it out and drive it off. Do that, and see what IT does. Only acts of nature can measure IT's physical power. We humans are the refecting part, the point of a vast thing, as if we were the concious spear- point affixed to a very long shaft composed of a mixture of material and spiritual energy, the focus and organizing point of the spirit of life itsellf, pointing us to our potential or our destruction. I would love to say we are and have been good for life, but alas, I cannot. We are not, and have not, done our job or lived up to our potential as the very living point of the spear of life, and have not lived up to our assumed our position as the accelator of the great spear of life flying through time and space. We have taken another role, far off our optimal target.
|
Back to Fireman-Cowboy Land
Instead, I stuck around and helped the boys pack up camp, and played cowboy. The dudes thought it would be funny to give me the oat bag and turn me out into the pasture area to gather their mounts. I frkn love horses and mules. The cowboys figured it would be fun watching the horses rush me, and manhandle me surging for the oat bag. Wrong. I know that the oat bag is as much of a weapon as a treat.
Ask for oats nicely, and you get oats. Try to get the oats on the run, and you get the oat bag. I swing a mean oat bag. The horses, mules, and I worked this out quite quickly, and everyone soon had a halter and lead on, along with a few mouthfuls of tasty oats.
Below: When I showed them the oat bag, shook it, and gave a whistle they came running. Note the mule on the right. He had already tried to rush me, and was now considering his next move. I already knew what it was: a halter for a handful of oats. In a few more seconds the rest of the kids had surrounded me, and I had to stash the camera to control the stock.
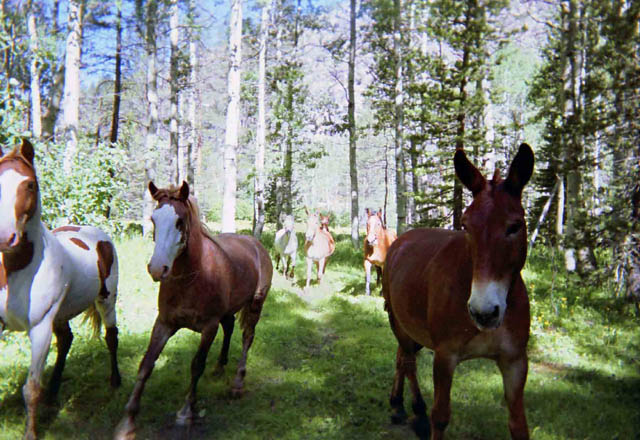
Above: Horses and Mules really like oats. Yeah, I got 'em.
There goes my chicken cordon-blu, cold beer, and the horses and mules above under pack or mount:
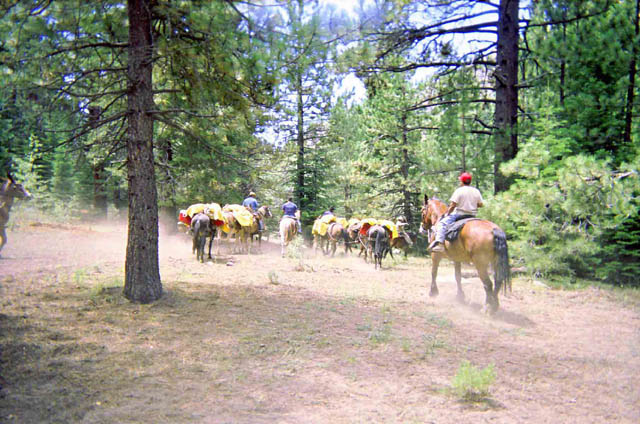
Above: Gourmet food, cold beer, and the Riverside firemen riding away.
I once helped a group of eight backpackers chase the bear that stole their food around No Name Lake, to the N of Banner Peak. After about 40 minutes of chasing him around, bear had dropped 7 of the 8 food bags he had in his mouth, and most of the contents of the 8th bag spilled out for them to recover.
Poor bear: he started with the whole jackpot, and ended up with almost nothing...
Varmints are easy. During Winter I do a low hang off a tree to keep the coyotes from running off with my food.
The Comfortable Kitchen and Camp
After a hard day hiking I want to kick back hard. I want the perfect seat with elevated feet. I want my stove, food, water, trail journal, extra clothes, and everything I am going to need within easy reach. The four following picture's common theme is my throne surrounded by all necessities.

Above: Ready to eat. March 2010 having my breakfast at a little dry spot near Round Lake in the Meiss Roadless area in the South Tahoe Basin. There is no big water bottle as I am melting snow for all water needs.
Once I sit down, I do not want to get up until after the meal is done, I am full, warm, and relaxed.
| Campsite featuring perfect rock chair with all necessary gear arrayed within reach. | Ready to sit down and not get up until I'm done eating and drinking. All I need is within reach. | |||||
| ,, | 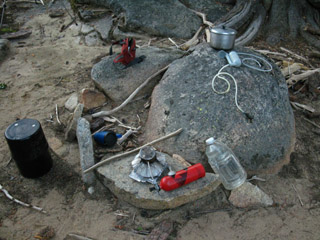 |
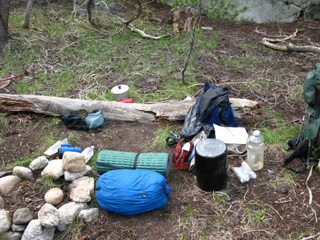 |
||||
| Summit City Creek, Tahoe to Yosemite Trail. Everything is secure for me to take a nice hike, so the stove is sitting on my chair's seat. | Jack Main Canyon, PCT & TYT in the North Yosemite backcountry. The downed tree fit and perfectly supported my lower back, while the pad and sleeping bag comfortably elevated my feet and legs. Very Nice... Ready to Rest and Refuel. |
The Perfect Seat. I like to find campsites where I will fit perfectly into the terrain. I mean literally, as in finding some rock or tree that my back and butt fit into perfectly for relaxing support. We were made to fit into nature.
Bed Pads. I never use those blow-up pads because my rolled up foam pad is my portable seat anywhere along the trail. It instantly comes off my pack and makes many boulders and trees the perfect seat-back, or provides a leg rest for the perfect natural seat.
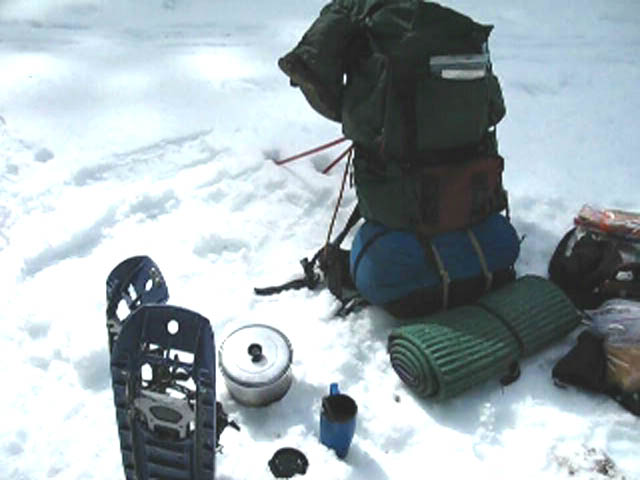
Above: Instant comfortable break spot with butt pad and backrest, all my trail luxuries within reach... And there is not a solid thing to sit on for as far as the eye can see. Do this with your thermarest and internal framed pack. Not happening.
I've met many backpackers along the trail who were astonished at the level of hunger and cold they were experiencing along the Sierra Crest trails. A lot of ladies have a cold sensitivity. If you are cold sensitive make sure you pack the extra layer, such as a light down coat, that will make the difference between discomfort and comfortable evenings.
Starting a long backpacking trip may disrupt your metabolism a bit. Adjusting to elevation, weight, and climbing can stifle the appetite a bit at the beginning of a trip.This will pass, and you will develop a voracious appetite.
After eating a high-nutrition well-balanced 3000 calorie daily diet I pile on the hot chocolate, coffee, sugar drinks, nuts, and sweet dried fruits. This comfort food will fill out your body's demand for massive calories. I really don't see any reason to go to sleep hungry on the trail. Unless a bear eats your food...
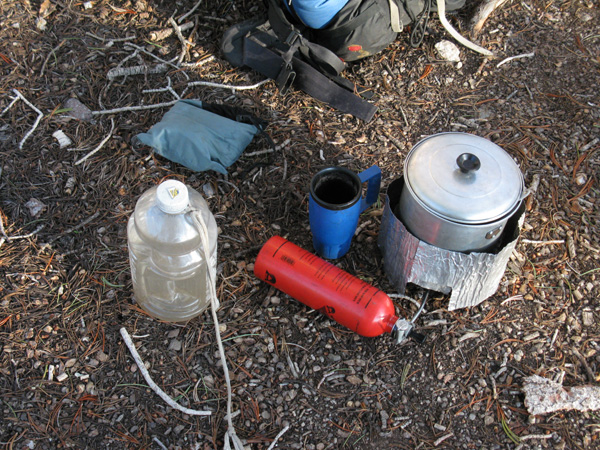
Above: Luxury break-time ready for fresh water and coffee jumped up with hot chocolate at the unmarked trail junction between the East Carson River Trail and the Pacific Crest Trail in the Carson-Iceberg Wilderness. Maybe a pack of Ramen Noodles too...
Camp Visitor, South of Mather Pass
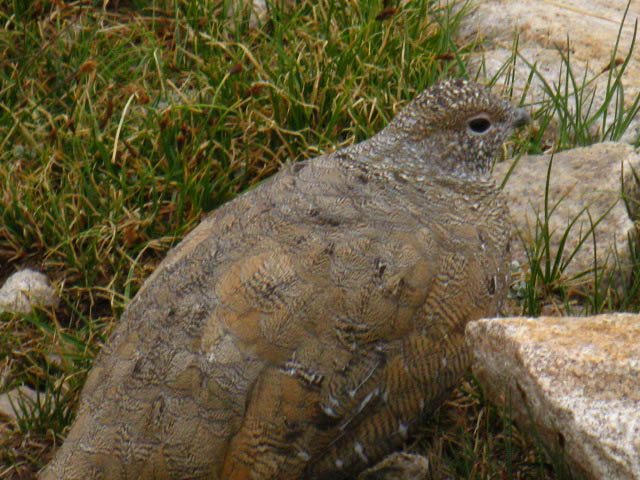
Above: White-tailed Ptarmigan, which I call mountain chickens. I wanted to show that you will get visitors other than bears.
Epilogue
You may have noticed that I focused this page on the Camp and Trail Skills necessary for dealing with the volatile nature of High Sierra Weather.
This is when you will most need your camp and trail skills to keep you warm, comfortable, well fed and ready for the next day's obstacles.
These skills are not important when everything is going right.
THIS PAGE IS UNDER CONSTRUCTION: STAY TUNED FOR MUCH MORE!
COME ON BACK NOW, 'YA HEAR?
Next page:
Last page: GEAR PAGE Next page: ART OF WALKING
Backpacker ForumsHave a general backpacking issue to share?Post it on To post up comments, questions, or your own camp tricks and tips, see the Camp and Trails Skills Forum:Forum: |
Trailhead
Contact
Alex Wierbinski
Backpacking Lake Tahoe to Mount Whitney
Your guide to the High Sierra Crest, including the Tahoe to Yosemite, Pacific Crest, and John Muir Trails